.svg)
Step-by-step checklist to plan, specify, budget, install, and maintain LED warehouse lighting — includes audits, controls, rebates, and ROI.
Switching your warehouse lighting to LEDs can cut energy costs by 50%–70% and reduce maintenance expenses by up to 90%. LEDs last longer, improve visibility, and meet safety standards like OSHA and ASHRAE 90.1. Most LED retrofits pay for themselves in 2–3 years, especially when paired with rebates and tax deductions.
Here’s a quick overview of the process:
Switching to LEDs not only saves money but also creates a safer and more efficient workspace.

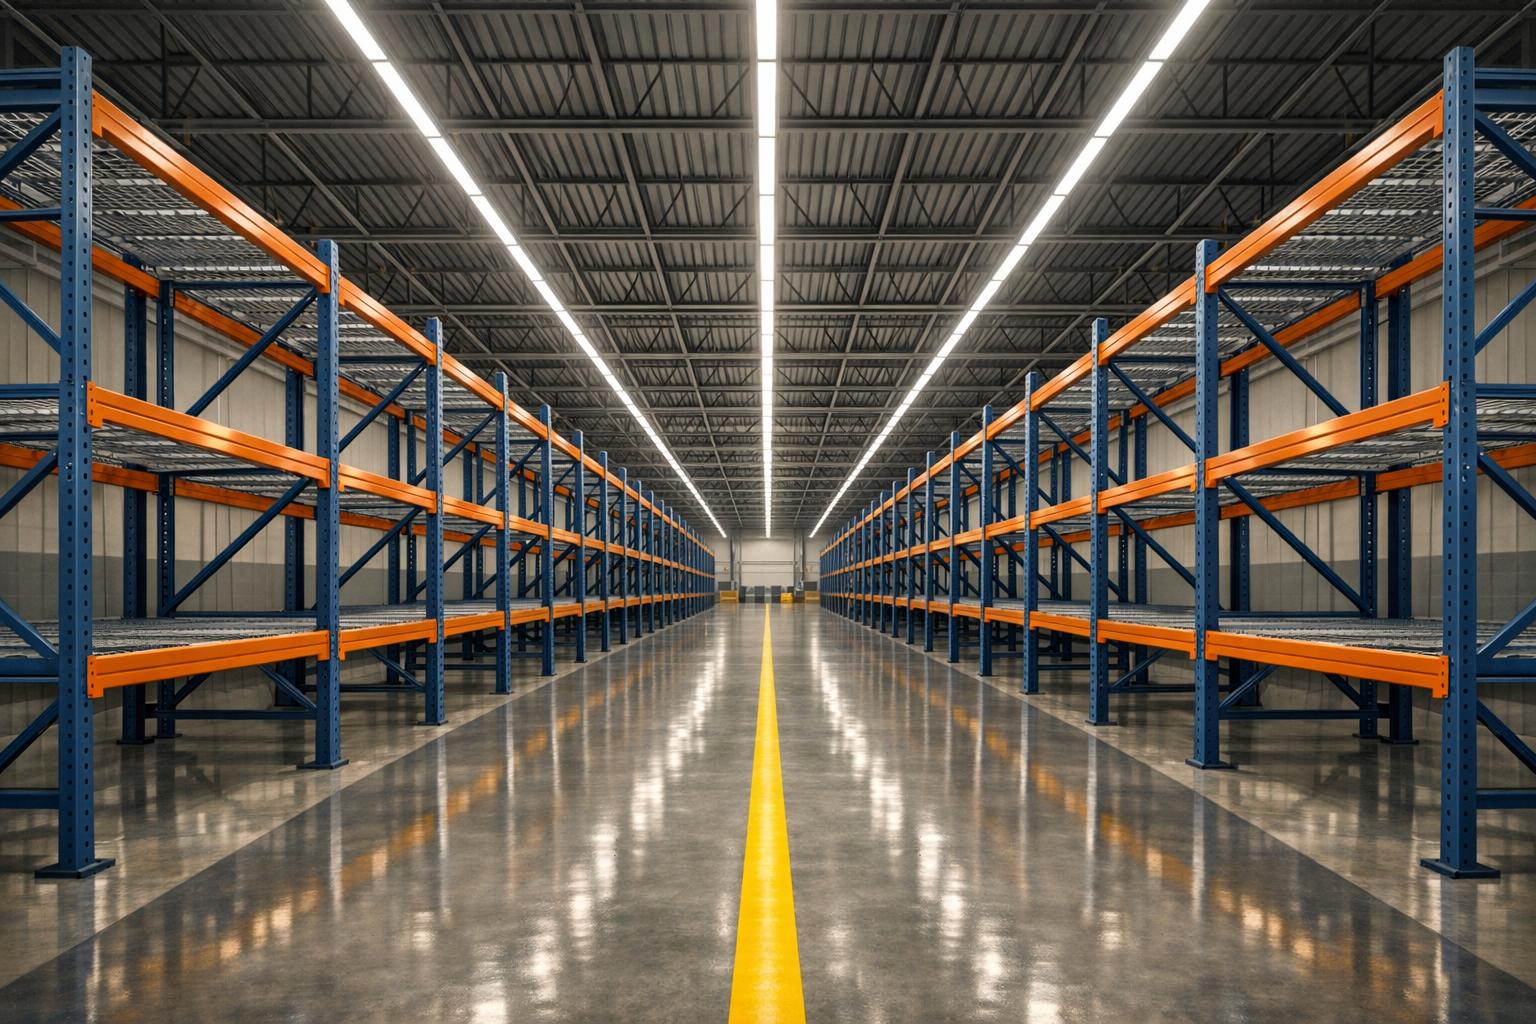
7-Step LED Warehouse Lighting Upgrade Process
Before investing in new fixtures, it's essential to map out your upgrade objectives. This planning phase can make the difference between achieving maximum value and falling short of expectations.
Start by ranking your priorities. Are you aiming to cut energy bills, reduce maintenance costs, or improve lighting for specific tasks? Many facilities focus on a mix of these goals: reducing energy consumption, lowering maintenance expenses, and enhancing visibility for tasks like reading labels or operating machinery. Clearly defined goals help align your upgrades with energy efficiency and safety standards.
From a financial perspective, most facilities aim to lower utility bills and maintenance costs. LEDs, for example, can last over 50,000 hours when used 12 hours a day, significantly reducing replacement and labor expenses. On the performance side, achieving a Color Rendering Index (CRI) of 70 or higher and selecting the right color temperature - typically 4000K or 5000K - are common goals.
Consider adding smart features like motion sensors or dimming capabilities to automate energy savings. If your facility requires emergency backup systems, look for fixtures with built-in batteries that provide at least 90 minutes of illumination during power outages.
Once your goals are clear, assess your current lighting setup to identify specific areas for improvement. A thorough lighting audit sets a baseline and highlights opportunities for upgrades. Start by collecting detailed data on your fixtures: lamp types, wattages, and ballast configurations in every zone. Use a light meter to measure illumination levels in foot candles at task areas, identifying spaces that may be over-lit, under-lit, or suffering from glare.
It’s important to calculate actual burn hours instead of relying solely on business hours. As Billy Ramirez, FSG Albuquerque Branch Manager, emphasizes:
"The most important part of conducting a lighting audit is writing down the exact number of fixtures, the right lamp and wattage types in every fixture, as well as the 'burn hours' for each light, and not just the business's hours of operation".
Don’t forget to account for cleaning crews, early or late shifts, and exterior lighting that operates from dusk to dawn. Additionally, note factors like mounting heights and environmental conditions (daylight, wall reflectivity) that influence light distribution. Even something as simple as a dirty lens can reduce light output by more than 50%.
The data from this audit will guide you in selecting LED specifications that fit your needs.
With your goals and current lighting conditions in mind, turn your attention to operational factors that could impact installation. Plan upgrades during off-peak times, holiday shutdowns, or other low-activity periods. If the project needs to be phased, consider upgrading zone by zone to minimize disruptions.
Be mindful of physical constraints like ceiling height, installation methods (e.g., pendant, cable, or eye hook), and potential obstructions such as HVAC equipment. Some areas may require specialized fixtures, such as those with IP65/IP69K ratings for wet or washdown zones, IK10 impact ratings for areas with forklift traffic, or explosion-proof fixtures for hazardous environments.
Additionally, align your timeline with rebate program requirements, as many incentives involve post-installation inspections within a specific timeframe. And don’t overlook OSHA workplace safety standards, ensuring your new lighting provides adequate illumination.
With your audit data in hand, it’s time to pick fixtures that meet your warehouse’s unique requirements. Choosing the right specifications ensures proper lighting, energy efficiency, and long-lasting performance.
Lighting needs can vary widely depending on the tasks performed in different areas of your warehouse. For example:
The height of your ceilings also plays a big role in fixture selection. Here’s a quick guide:
For instance, a facility in Williston, ND, upgraded to 200-watt LED UFO fixtures installed at 20 feet. This setup delivered an average of 60.33 foot-candles, reduced energy use by 46%, and paid for itself in under 19 months. Over five years, the estimated savings reached $26,842.75.
Don’t forget about vertical illumination - it’s critical for clear label reading and safe forklift operation. Fixture optics also matter: linear high bays are ideal for narrow aisles, while UFO fixtures excel in open areas. Additionally, wall and ceiling colors can affect lighting performance. Darker surfaces absorb more light, which might require brighter fixtures to maintain even illumination.
Once you’ve nailed down your lighting needs, it’s time to assess fixture durability.
Durability is key to ensuring your fixtures last. This is where IP and IK ratings come into play:
The right color temperature and Color Rendering Index (CRI) can significantly impact worker comfort and safety:
Once you've finalized your LED specifications, it's time to dive into the financial side of your project. Having a clear understanding of costs and savings will help secure stakeholder approval and ensure a smooth path forward. A thorough cost analysis will outline both your expenses and potential savings.
Using data from your energy audit, you can estimate your energy savings by analyzing wattage reductions. Start by gathering your baseline information: document the wattage of your current fixtures (don’t forget to account for legacy ballast energy use, which typically adds about 15% to the rated wattage), note annual operating hours, and review your electricity rate from recent utility bills. For instance, a 400-watt metal halide fixture actually uses around 458 watts when the ballast is included. Replacing it with a 150-watt LED fixture would save about 308 watts per unit.
To calculate your energy savings, multiply the wattage reduction by the annual operating hours, then divide by 1,000 to determine the kWh savings. A great example of this approach can be seen in a cold storage facility in Ontario, California. In March 2024, the facility replaced 312 metal halide fixtures with 180-watt LED high-bays. This change resulted in annual savings of 552,960 kWh, equating to about US$74,650 in energy costs. On top of that, the facility avoided an additional US$22,464 in yearly maintenance expenses.
Rebates and incentives can significantly shorten the payback period for your LED retrofit project. Resources like ENERGY STAR's Utility Genius Rebate Finder and the Database of State Incentives for Renewables & Efficiency (DSIRE) are excellent tools for identifying available programs. Keep in mind that many utility rebates require fixtures to be listed on the DLC Qualified Product List, and some programs mandate pre-approval before installation begins. Starting your project too early could disqualify you from receiving these benefits.
The federal 179D tax deduction is another avenue to explore. It offers up to US$1.80 per square foot for lighting upgrades that achieve at least a 25% reduction in energy use. For example, in September 2024, a Columbus e-commerce distribution center received a US$10,890 incentive from AEP Ohio, reducing their net investment from US$61,380 to US$50,490. With energy savings of 78%, the project’s payback period was reduced to approximately 10.8 months.
When budgeting, account for the entire scope of the project, including the cost of fixtures, labor for installation, and disposal of old equipment. As of 2026, commercial-grade 150-watt LED high-bay fixtures are priced between US$95 and US$165 each. Installation costs can vary: straightforward fixture replacements typically range from US$45 to US$85 per unit, while more complex work, such as running new wiring, can cost between US$120 and US$220 per fixture. Additionally, plan for disposal fees of around US$8–US$18 per fixture, especially for items like mercury-containing ballasts.
The total project cost generally falls between US$3.00 and US$8.00 per square foot, depending on the facility type. Standard warehouses are often at the lower end (US$3.00–US$4.50 per square foot), while cold storage facilities, which require specialized components, can range from US$5.50 to US$7.50 per square foot. Adding features like occupancy sensors or networked controls may increase upfront costs by 15%–30%, but these upgrades can push energy savings to as high as 70%–80%. For facilities that operate 24/7, phased installations during scheduled maintenance windows may increase labor costs but help minimize disruptions to operations.
For expert guidance on budgeting, identifying incentives, and planning installations through a proven lighting solutions process, consider reaching out to Luminate Lighting Group.
After choosing your LED fixtures and setting up your budget, it’s time to think about smart controls that can maximize energy savings. For example, networked lighting control systems can save an average of 49% on energy, and in warehouses, that number can climb as high as 68%. Features like motion sensors, dimming, and daylight harvesting can help trim costs even further.
Motion and occupancy sensors are great for automatically managing energy use by either dimming or turning off lights in areas where no one is present. These features are increasingly required by modern energy codes. To make the most of these controls, ensure your LED fixtures are equipped with 0–10V dimmable drivers for precise brightness adjustments.
A more advanced option is Luminaire Level Lighting Control (LLLC), which integrates sensors directly into each fixture. This setup can deliver 14% to 28% more energy savings compared to systems without LLLC, while also simplifying installation by reducing the need for extensive wiring.
Networked control systems add another layer of functionality, allowing for group-wide adjustments and remote management. When selecting fixtures, confirm that the drivers are compatible with these systems and offer flexibility for post-installation tweaks. Fine-tuning brightness levels and occupancy timeouts after installation is often necessary to get the best results. These controls also pave the way for energy-saving strategies like daylight harvesting.
Daylight harvesting uses photocells to measure natural light levels and automatically adjusts LED brightness to maintain consistent lighting. This is especially useful in spaces like warehouses with skylights or large windows, where natural light changes throughout the day. To implement this feature, ensure your LED fixtures are equipped with 0–10V dimmable drivers that can handle smooth, automated adjustments.
Pairing daylight sensors with occupancy sensors ensures lights only adjust when spaces are actively being used. Lighting plans can help you visualize how natural light enters the space and identify the best locations for sensors and fixtures. In facilities with heavy machinery or conveyor systems, it’s also wise to choose fixtures with built-in surge protection to safeguard against voltage spikes that could damage smart drivers. While daylight harvesting can lead to significant energy savings, it’s equally important to prepare for emergencies.
Smart lighting controls aren’t just about saving energy - they’re also crucial for emergency preparedness. Emergency backup systems are a safety must-have, providing at least 90 minutes of illumination during power outages. Most compliant systems are designed to recharge fully within 24 hours after power is restored.
There are two main options for emergency systems: integrated battery backups or generators with power blip sensing. Battery backups are more common but can be tricky to test in high-mount installations. Generators, on the other hand, are more robust but often need additional power sense wiring. Power blip sensing technology simplifies this by detecting the switch to generator power and triggering emergency mode without requiring extra wiring.
To ensure compliance with NFPA 101 and local electrical codes, always check emergency lighting performance and duration requirements with your local Authority Having Jurisdiction (AHJ). When testing emergency systems, turn off the circuit breaker instead of relying solely on the fixture’s test button - this better simulates a real power outage. Conduct annual inspections to check battery voltage, look for corrosion, and confirm proper charging cycles. Maintaining a digital log of testing dates and battery replacements will also help satisfy safety audits.
Once you've finalized your LED specifications and budget, it's time to focus on the actual installation. A well-thought-out plan can reduce downtime and keep your operations running smoothly. For most small to mid-sized warehouse lighting projects, the process typically takes 1–3 days. However, this timeline largely depends on how effectively you coordinate the work.
Timing plays a key role in ensuring a smooth upgrade. If your facility operates during standard business hours, plan installations for evenings or weekends when the space is unoccupied. This minimizes disruptions and allows contractors to work without interference.
For warehouses that run 24/7, consider a phased approach. Break the installation into manageable sections and schedule work during off-peak hours. This method ensures continuous operation while the upgrade progresses. To avoid delays, make sure all fixtures, wiring, and components are delivered to the site before the installation begins.
Once your schedule is set, the next step is coordinating with contractors. Hiring qualified electricians and lighting experts ensures the job is done correctly. Provide them with detailed audit data to prevent compatibility issues.
Before starting, contractors must verify the service voltage. Using incompatible drivers can lead to immediate failures and void warranties. Additionally, legacy ballasts from HPS or fluorescent systems must be removed or bypassed to avoid damaging LED drivers. Assigning a project manager from your team can help monitor progress and address unexpected challenges like equipment failures or delivery delays.
A pre-installation walkthrough is essential. Use this time to review fixture placement and address any safety or access concerns. If you're installing smart controls or emergency backups, confirm that technical support is available for troubleshooting after the installation. Don't forget to schedule inspections with local authorities in advance to avoid delays stemming from incomplete documentation.
Before installation begins, double-check that all components meet required certifications and warranty standards. Ensure fixtures carry certifications like UL (Underwriters Laboratories) or ETL (Intertek), which confirm compliance with U.S. electrical safety standards. If you're aiming for utility rebates, make sure the fixtures are DLC (DesignLights Consortium) qualified, as this is often a requirement for incentive programs.
Environmental ratings are equally important. For areas exposed to dust or water, look for IP65+ ratings. Locations with a high risk of impact, like those with heavy forklift traffic, should use fixtures with IK10 ratings. If you're using retrofit kits, check for UL 1598C certification to ensure the modified luminaires meet safety standards.
Review warranty terms carefully. Understand the coverage period, what components are included, and under what conditions the warranty may be voided. For example, mismatched voltage or uncertified parts can invalidate the warranty. Finally, make sure your supplier provides post-installation technical support for tasks like commissioning controls or troubleshooting issues.
| Certification/Rating | Purpose |
|---|---|
| UL / ETL | Ensures compliance with U.S. electrical safety standards |
| DLC | Required for energy efficiency rebates |
| IP65 / IP69K | Protects against dust, water, and high-pressure washdowns |
| IK10 | Provides maximum resistance to physical impacts |
| UL 1598C | Certifies LED retrofit kits for safety compliance |
| UL 924 | Covers emergency lighting and power equipment |
After installing your LED system, the job isn't over. To ensure your investment delivers the expected energy savings and lighting quality, you’ll need to verify performance and establish a maintenance plan. These steps help maximize the benefits of your LED upgrade while keeping costs in check.
Before diving into measurements, let your new LED system warm up for at least one hour. This ensures the lights reach stable operating conditions, giving you accurate readings. Use a light meter to measure illuminance on task surfaces, and aim for results that align with your design goals. To avoid interference from natural light, take these measurements during times when daylight can be excluded.
For facilities using advanced controls like occupancy sensors or daylight dimming, energy monitoring requires more effort. Track power usage over at least two weeks of normal operation (avoiding holidays) to understand how the system performs in day-to-day conditions. Establish a baseline by monitoring power draw at full capacity, which will help you calculate energy savings accurately. Additionally, confirm that emergency backup batteries provide at least 90 minutes of illumination during a power outage and can recharge fully within 24 hours.
| Equipment Type | Purpose | Recommended Specification |
|---|---|---|
| Energy Logger | Measure real-time energy use via circuit | Uncertainty: ±1% of reading |
| Illuminance Meter | Establish functional performance | Uncertainty: ±3%; Range: 0.1 to 10,000+ fc |
| Power Meter | Establish true power of new system | Uncertainty: ±3%; High sampling rate (240Hz+) |
Once you've set performance benchmarks, shift your focus to a maintenance plan that ensures long-term efficiency.
Unlike traditional bulbs that burn out suddenly, LEDs gradually dim over time. Most warehouse LEDs are rated for 50,000 hours or more, but this gradual dimming can make it tricky to identify when replacements are needed. Regular cleaning is especially important in dusty environments, as dirt buildup can reduce light output.
"Effective end-of-life for LED is when the lumen output dims to 70% of the initial lumens. This is the point where the illumination level has dimmed enough to impact the productivity, performance and attitude of the occupants of the space." - ProLampSales
Plan for annual maintenance audits to check for failed lamps, system errors, and sensor performance. Use a light meter to measure foot-candle levels at installation and then yearly to monitor lumen depreciation. Advanced controls, like occupancy sensors, may need occasional troubleshooting or reprogramming to maintain efficiency. If your facility operates heavy machinery, inspect surge protection devices regularly to safeguard LED drivers from damage.
Ongoing maintenance directly impacts your system's financial performance, so keeping detailed records is key. Start by calculating your net investment, factoring in utility rebates and federal tax incentives (such as Section 179D) to offset costs for fixtures, labor, and disposal. Then, measure annual energy savings by comparing pre-upgrade and post-upgrade electricity usage, adjusting for your local electricity rate.
Maintenance savings are another big win. With LED lifespans of 50,000–100,000 hours, you'll avoid frequent relamping costs, which can run $53–$85 per fixture annually for high-bay installations. Advanced controls can amplify savings, with occupancy sensors and daylight harvesting reducing energy use by 70–80% when correctly configured. For systems with daylighting controls, compare energy use during periods with and without these controls activated to measure their specific contribution.
Switching to LEDs is an investment that starts with careful planning. The foundation of a successful retrofit lies in conducting a thorough lighting audit. This step gathers the essential data needed to select the right hardware and achieve measurable improvements.
Paying attention to technical specifications is equally important. Choosing fixtures with the right CRI, color temperature, and certifications like UL/ETL for safety or DLC for rebate eligibility ensures your system meets both operational and regulatory standards. For facilities with heavy machinery, features like integrated surge protection and emergency backup batteries - capable of providing 90 minutes of illumination - are vital for reliability and compliance. These details pave the way for enhanced efficiency.
Incorporating smart controls, such as motion sensors, dimming capabilities, and daylight harvesting, helps minimize waste and allows for installations during downtime, increasing your return on investment. By following this step-by-step approach, you can achieve energy savings and operational efficiency, with each phase - from the initial audit to ongoing maintenance - contributing to a dependable and cost-effective lighting system.
After installation, regular performance evaluations are essential. Monitoring illumination levels, energy usage, and the functionality of control systems ensures your LEDs continue delivering their promised 50,000+ hours of output. Keeping track of documented energy savings not only confirms your ROI but also provides insights for future upgrades, ensuring you reap long-term benefits.
If you’re looking for expert help in customizing your LED retrofit for your warehouse, check out Luminate Lighting Group.
A lighting audit is a smart first step before switching to LEDs. It takes a close look at your current setup - things like fixture types, energy consumption, and light levels. This process helps pinpoint areas where you can save energy, ensures your system meets energy codes, and customizes the LED upgrade to fit your specific needs. The result? Better safety, compliance with standards, and a stronger return on investment.
To determine the right lumens for your ceiling height, think about both the height of the ceiling and the activities happening in the space. For instance, ceilings between 15 and 20 feet typically need around 7,000 to 11,000 lumens, while taller ceilings - 18 to 30 feet - may call for 13,000 to 15,000 lumens.
It's also important to maintain proper foot-candle levels to ensure good visibility and efficiency. For example, general warehouse areas usually require 20 to 30 foot-candles. To refine your choice, tools like photometric layouts can be incredibly helpful.
Federal tax incentives could make upgrading to energy-efficient systems more appealing. Under Section 179D, you might qualify for deductions of up to $5.00 per square foot, while bonus depreciation allows for a 100% deduction on eligible LED systems in 2025. Additionally, utility rebates for LED bulbs usually range from $0.50 to $2.50 per bulb, with an expected increase of 10–20% in 2025.


