.svg)
Cut hotel and restaurant lighting energy with LED upgrades, smart controls, daylight strategies, and phased rollouts for fast payback.

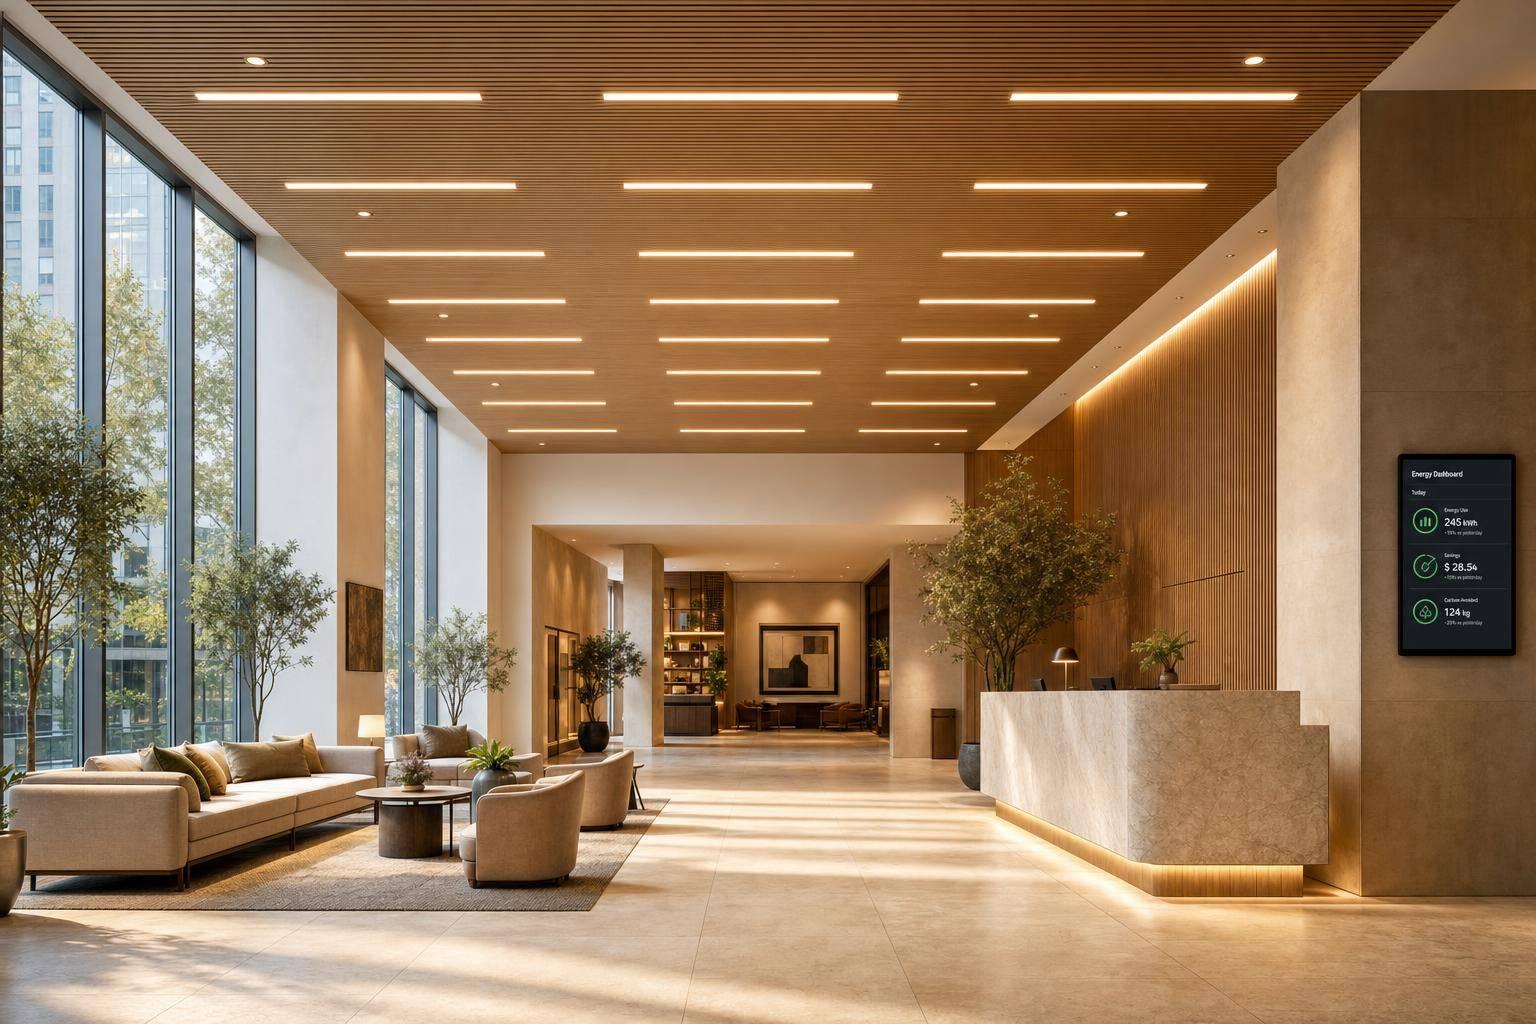
Lighting is one of the fastest places I’d look to cut hotel and restaurant costs without hurting the guest experience. In many properties, LED upgrades can trim lighting energy use by up to 75%, and long-life lamps rated for 50,000 to 100,000 hours can slash replacement work compared with incandescent bulbs that last about 1,000 hours.
If I had to boil this guide down, it’s this:
Here’s the simple takeaway: I can cut power use, trim labor from relamping, and keep spaces comfortable if fixture choice, controls, layout, and commissioning all work together. One case in the article shows a Hilton project that saved $82,750 per year and hit a 9-month payback after rebates.
| Area | Best first move | Main payoff |
|---|---|---|
| Corridors & lobbies | LED retrofit + sensors | High savings from near-constant runtime |
| Guest rooms | LED lamps + dimming + GRMS or vacancy controls | Lower waste and better guest control |
| Restaurants & lounges | Layered lighting + scene controls | Better mood with less wasted light |
| Exterior & parking | LED fixtures + scheduling/sensors | Lower maintenance and better visibility |
| Back-of-house & kitchens | Replace old fluorescent/HID fixtures | Lower energy use and less heat |
If I’m planning hospitality lighting today, I’d focus on better light, lower kWh, fewer lamp changes, and a phased rollout with clear payback by area.
Once sustainability goals are clear, the next move is simple: apply them room by room. That’s where lighting design starts to pay off. A smart layout, good light quality, and better use of daylight can lower energy use, make upkeep easier, and help guests feel at ease.
Each hospitality space needs its own mix of lighting. Get that mix right, and you improve the guest experience without filling the room with extra fixtures. The goal is to layer light by function, so each fixture does one specific job.
In guest rooms, that usually means overhead fixtures for ambient light, a corner lamp for mood, and focused reading lights by the bed or desk. It’s a much better setup than relying on one bright ceiling fixture to do everything. That kind of all-in-one lighting can make a room feel flat and use more energy than needed. In corridors and circulation areas, a steady level of ambient light is often enough; Ra ≥ 80 is sufficient.
Dining areas, lobbies, and lounges also work best with layered lighting. Ambient light sets the base level. Task lighting supports work surfaces or front desks. Accent lighting draws attention to key features. For visual comfort and function, keep task-plane uniformity at 0.4 or higher. Also keep adjacent zones within a 10:1 brightness ratio to avoid jarring shifts from one area to the next.
Give each zone three scenes:
Once those layers are in place, the next step is dialing them in for comfort.
A few lighting targets go a long way here. They help keep spaces comfortable while also cutting electric-light demand.
Start with color temperature. Keep CCT consistent within each room or zone. Similar fixtures should stay within ±200K. That small detail matters more than people think. When color temperature drifts too much in the same space, the room can feel off even if guests can’t quite say why.
For color rendering, use CRI 90+ in guest-facing spaces. In corridors, use Ra ≥ 80, with R9 ≥ 50 for sources in the 80 to 90 range.
Glare is one of the most common complaints in hospitality lighting, and in many cases, it’s preventable. Pick fixtures that hide the light source from direct view. The target is a Unified Glare Rating (UGR) of 19 or lower for regularly occupied spaces, or a luminance below 6,000 cd/m² at angles between 45° and 90° from nadir. This is especially important in lounges, lobbies, and guest rooms, where people stay for long stretches.
Guest room lighting should also dim after 8:00 pm to support sleep.
Daylight can do a lot of the heavy lifting if the space is planned well. Put regularly occupied areas near glazing. In seating areas, target 70% of seats within 16 feet of windows and at least 30% of occupied area within 20 feet of glazing. Glazing area should be no less than 7% of the regularly occupied floor area per floor level.
It also helps to avoid blocking that daylight before it can spread into the room. Don’t place opaque obstructions taller than 3.2 feet within 20 feet of glazing, since they can stop daylight from reaching the interior.
Of course, daylight needs control. Left unchecked, it can add heat. Automated shading systems help by reacting to daylight levels and occupancy, which cuts reliance on artificial lighting while limiting solar heat gain. Pair daylight sensors with dimmable LEDs so light output drops when daylight is already doing the job.
These choices create the starting point for the LED and control updates that come next.
With the lighting basics in place, the next move is picking fixtures that turn those goals into lower power bills and fewer maintenance calls.
Corridors and lobbies are the first places to look because they run 24/7. That nonstop use makes them top retrofit targets. Exterior entries and parking areas come next. LEDs cut how often staff need to replace lamps in hard-to-reach fixtures, which helps trim maintenance labor. Guest rooms can add up to major savings too, simply because most properties have so many fixtures. Controls help pull in the rest of the savings. Back-of-house areas like kitchens and service corridors often still use high-wattage fluorescent or HID fixtures, so switching to LEDs cuts energy use and lowers heat in spaces where cooling load matters.
| Hospitality Area | Priority | Primary Savings Driver |
|---|---|---|
| Corridors & Lobbies | High | 24/7 operation |
| Exterior & Entries | High | Maintenance access costs |
| Guest Rooms | Medium | High fixture volume |
| Back-of-House | Medium | Legacy fixture replacement |
| Ballrooms & Restaurants | Medium | Dimming performance |
Don’t compare lamps on wattage alone. The specs that matter most in a retrofit are delivered lumens, dimming compatibility, rated life, enclosed-location suitability, and installed cost. Once you lock in the replacement spec, the next step is simple: match the light quality to what the room needs.
| Hospitality Area | Light Quality | Notes |
|---|---|---|
| Guest Rooms | Warm | Supports relaxation and guest control |
| Lobbies & Reception | Warm-neutral, consistent | Creates a welcoming first impression |
| Restaurants & Dining | Warm, high CRI | Helps food and décor look appealing |
| Spas & Wellness Areas | Soft, low-glare | Prioritizes comfort |
| Corridors | Even, neutral | Supports wayfinding |
| Exterior Entries | Bright, uniform visibility | Supports safety and security |
| Back-of-House / Kitchens | High-visibility | Supports work area demands |
Picking the right fixture gets you part of the way there. The controls are what decide how much of that efficiency the property keeps.
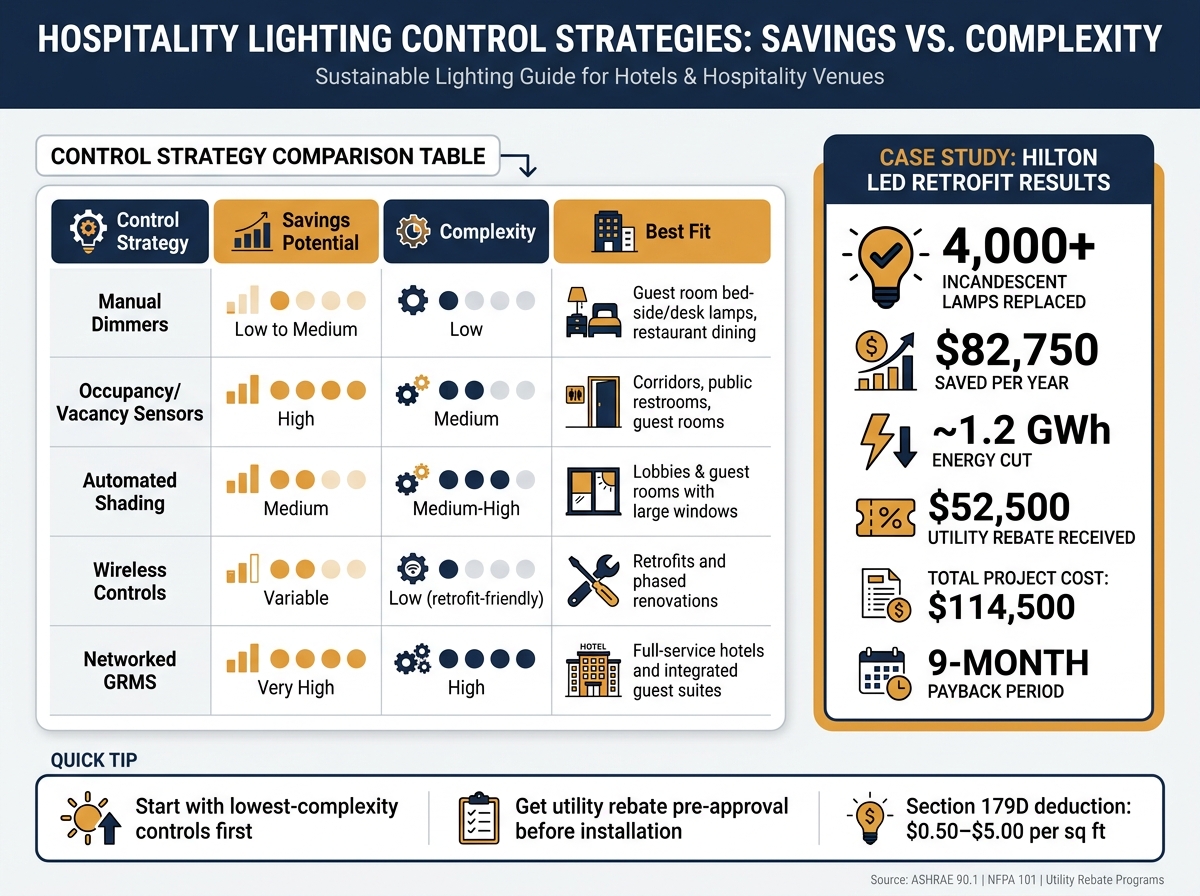
Hospitality Lighting Upgrade: LED vs. Legacy & Control Strategy Comparison
Fixtures set the baseline. Controls are what turn that setup into day-to-day savings.
Once fixture quality is locked in, controls decide how much of the upgrade pays off in practice.
Occupancy and vacancy sensors are one of the surest ways to cut wasted runtime. They work well in guest rooms, restrooms, corridors, and storage areas, where lights often stay on longer than needed.
Guestroom Management Systems (GRMS) take that a step further by connecting to hotel management software. When a guest checks in, the system can trigger a welcome scene with preset lighting levels and temperature. When the room becomes vacant, it can switch back to an energy-saving mode. It can also alert housekeeping when a room is ready.
In spaces with large windows, daylight-responsive dimming and shading help lower electric-light use. For common areas and lobbies, dimming and scheduling controls help finish the plan.
In the U.S., commercial lighting projects, including hospitality renovations, are guided mainly by ASHRAE 90.1. Three code points matter most:
These rules are useful for setting priorities. If you're deciding where to upgrade controls first, start with the spaces where code pressure and wasted runtime overlap.
Not every property needs a full GRMS rollout on day one. In many cases, it makes more sense to start with simpler controls, then build from there. The table below shows the tradeoffs so owners can match the right setup to their budget and building type.
| Control Strategy | Savings Potential | Complexity | Best Fit |
|---|---|---|---|
| Manual Dimmers | Low to Medium | Low | Guest room bedside and desk lamps, restaurant dining areas |
| Occupancy/Vacancy Sensors | High | Medium | Corridors, public restrooms, and guest rooms |
| Automated Shading | Medium | Medium-High | Lobbies and guest rooms with large windows |
| Wireless Controls | Variable | Low (retrofit-friendly) | Retrofits and phased renovations - fewer metal and plastic components than wired systems, easier to scale |
| Networked GRMS | Very High | High | Full-service hotels and integrated guest suites |
A practical way to start is with the lowest-complexity controls first, then expand into networked systems where payback is strongest. Once that control mix is set, the next move is phasing the upgrade by cost and payback.
After you set the control strategy, map the current lighting system before making changes. A room-by-room audit gives you the baseline you need.
Track fixture counts, lamp types, wattages, controls, operating hours, dimming, sensor coverage, and annual lighting kWh. Break that data out by guest rooms, corridors, lobbies, restaurants, meeting spaces, back-of-house, and exterior areas. That split matters because each zone runs differently and has a different tolerance for disruption.
As you review each area, note trouble spots like frequent relamping, color mismatch, dark circulation areas, and emergency fixtures that are overdue for testing. Those issues affect both the rollout plan and the business case.
For phasing, start where disruption is lowest and access is easiest:
Use the audit data to estimate savings, rebates, and payback for each zone. The basic math is simple: compare current lighting kWh to proposed lighting kWh, then multiply the difference by the local electricity rate. From there, layer in the effect of controls. In corridors, for example, occupancy sensors can cut lighting demand by around 70% compared to 24-hour operation.
Project results can shift fast once those changes are applied. One Hilton property replaced more than 4,000 incandescent lamps in its lobby, restaurants, ballrooms, and corridors with LEDs. That project delivered $82,750 per year in energy savings, cut nearly 1.2 GWh, and reached a 9-month payback after a utility rebate of $52,500 on a total project cost of $114,500.
Rebates need attention early. Many utility programs require pre-approval, and eligibility often depends on fixture efficiency and control specs. The Section 179D tax deduction may also apply to commercial lighting upgrades that meet ASHRAE 90.1 standards. Deduction values generally range from about $0.50 to $5.00 per square foot, based on the energy savings achieved.
It also helps to report payback by zone instead of rolling everything into one building-wide figure. Guest rooms, corridors, and back-of-house areas often produce very different savings profiles.
Once installation is done, check actual system performance against the savings model. Commissioning makes sure sensors trigger when they should, dimming ranges stay in place, scenes match from room to room, and schedules line up with how spaces are used.
Scene verification matters a lot in hospitality. Guests notice when one room feels dimmer than the next, or when public spaces look off at certain times of day. Brand presentation depends on that consistency.
Emergency lighting needs its own review process. NFPA 101 requires monthly 30-second battery tests and annual 90-minute full discharge tests for emergency lighting units.
Over time, fixture cleaning, control recalibration, and seasonal schedule changes help the system stay close to modeled output. Good asset tracking helps too. If you know which model is in which room, when it went in, and what the warranty covers, service gets easier and rebate paperwork is a lot less painful.
After design, LEDs, controls, and commissioning, the pattern is pretty clear. The best hospitality lighting programs bring together efficient fixtures, smart controls, and steady day-to-day operations to cut energy use, trim maintenance work, and reduce guest complaints.
Light quality sets the baseline: CRI 90+, UGR 19 or lower, and low flicker help support guest comfort.
Controls drive more savings, especially when dimming, occupancy sensing, scene control, and shading work as one system.
Wellness goals and efficiency goals line up: the same steps that improve comfort also cut wasted light.
Phased rollout and ongoing commissioning keep projected savings on track in day-to-day use. That’s what turns a lighting plan into lasting performance.
Start with a detailed energy audit. Look at fixture types, how each space is used, and where the biggest lighting loads show up. That gives you a clear picture of where energy is going and where the best savings are likely to come from.
Focus first on the areas that use the most energy. Those spaces usually give you the biggest payoff, so they should move to the front of the line.
Pay close attention to 24/7 zones such as parking garages, stairwells, and exterior lighting. These areas stay on for long stretches, which makes them prime targets for lighting upgrades.
In non-critical spaces like offices, supply closets, and utility rooms, use occupancy sensors so lights run only when needed. Also, address emergency and egress lighting first to support life safety compliance.
The fastest energy savings usually come from automatic shutoff and dimming controls that react to what’s actually happening in the space, including:
These controls cut wasted runtime and dial electric lighting down when daylight is doing the job, which can lead to immediate savings.
Swap basic on/off switches for dimmers so guests can set warm, inviting light levels and use less power at the same time. Add automation that dims or shuts off lights in empty rooms and adjusts brightness as daylight changes.
Layered lighting also helps. A mix of ambient, task, and accent lighting keeps spaces comfortable and well lit without wasting energy.
Luminate Lighting Group can design, retrofit, and validate these upgrades with lighting audits to help deliver code-compliant performance.


