.svg)
Controls—not just LED swaps—are essential for code-compliant, energy-saving office lighting retrofits.

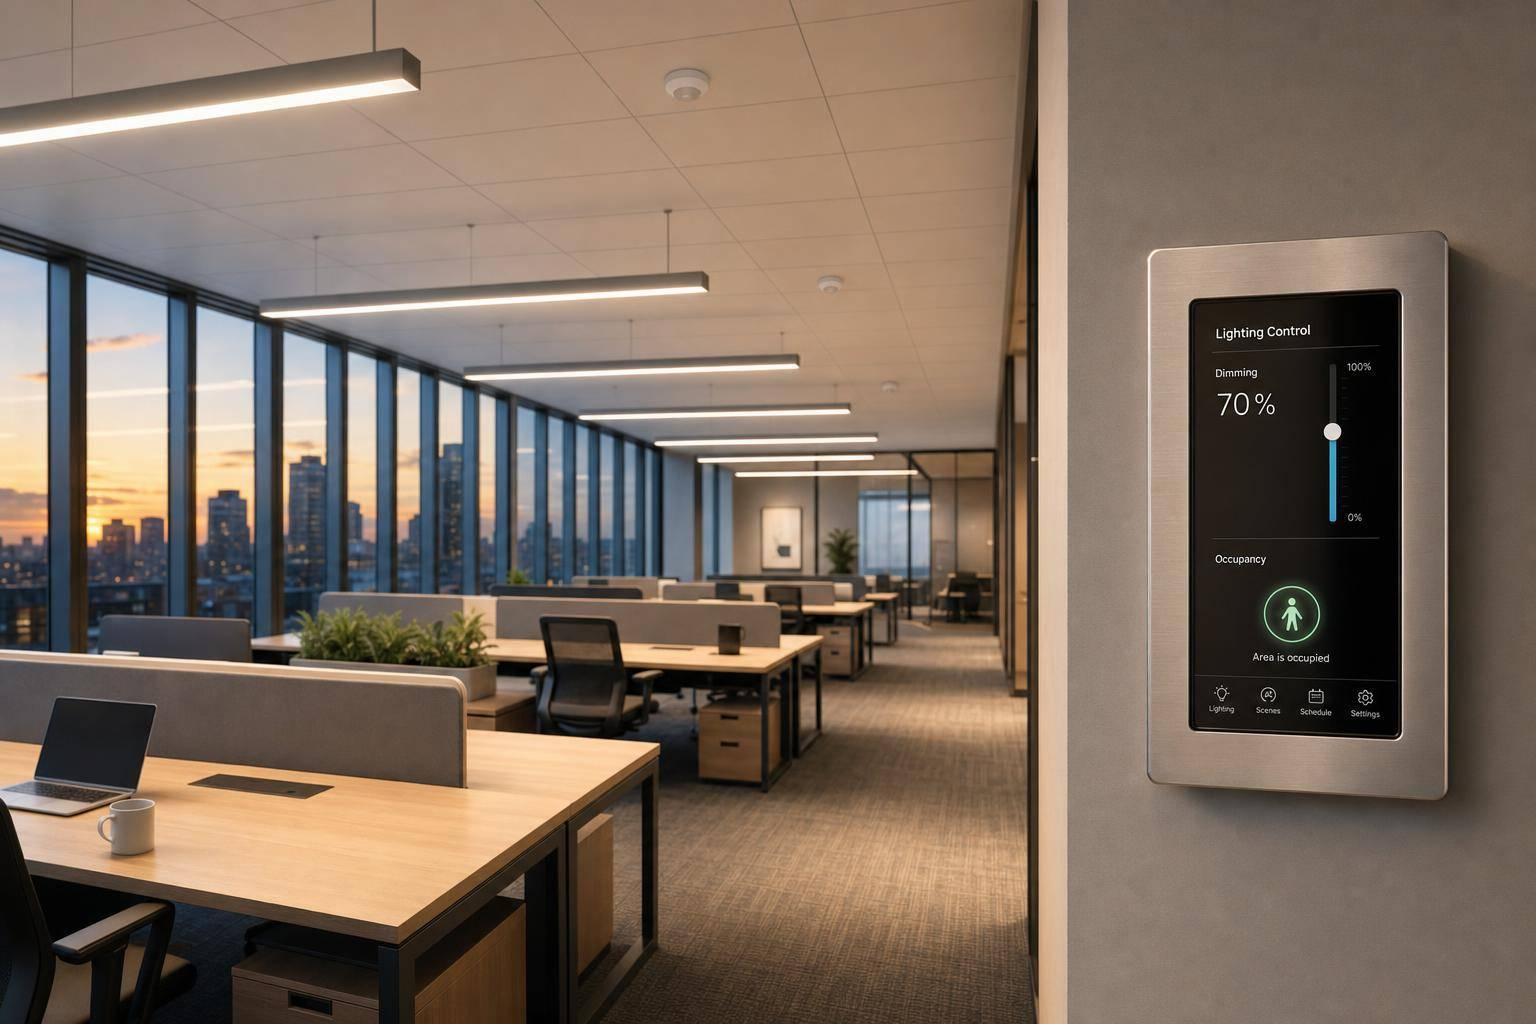
If you want an office lighting retrofit to pass inspection, I’d plan for controls from day one - not just LED fixture swaps. In most offices, code checks now focus on automatic shutoff, daylight dimming, space-by-space zoning, testing, and paperwork. Since lighting can account for 15%–20% of total commercial electricity use, getting the controls right can also cut a large chunk of waste.
Here’s the short version:
A few code points stand out. Daylight-responsive dimming is often required in window and skylight zones when the connected lighting load reaches 75 W or more. In large open offices, sensor zones are often limited to about 600 sq. ft. on average, with no zone above 900 sq. ft. And when demand response applies, lighting controls may need to cut load by at least 15%.
The main control types are simple to sort:
If I were planning this work, I’d match each room to its control rule first, then pick hardware, then write the Sequence of Operations, and only after that move into install and testing. That order helps keep the project aligned with code and avoids costly field fixes later.
Occupancy sensors take care of automatic shutoff in code-compliant office retrofits. In private offices and conference rooms, vacancy mode is often the better choice. It cuts down on false triggers and still stays within shutoff limits.
The sensor itself matters, and so does where you put it. Passive infrared (PIR) sensors are a good match for open spaces without many obstructions, such as private offices and restrooms. Microwave sensors can detect through obstructions, so they make more sense in spaces with partitions, tall shelving, or odd layouts.
Corridors and stairwells follow a different rule. These spaces allow partial-off control only. They do not allow full shutoff. After vacancy control is handled, the next code layer is daylight response around the building perimeter.
Photosensors and continuous dimming help perimeter fixtures react to daylight on their own. This is required in qualifying sidelit and toplit zones with a connected load of 75 W or more.
That said, daylight harvesting only works if perimeter and interior fixtures are zoned apart. Fixtures near windows - usually within about 15 feet of the glass - need their own control zones, separate from interior fixtures. In most cases, continuous dimming from full output down to very low output is the standard setup.
A small setup detail makes a big difference: program a 10% to 20% setback above the target light level in the photosensor. That helps stop constant tiny adjustments when clouds move across the sun. In conference rooms, local dimming controls give people more flexibility during presentations. On larger office floors, networked controls can carry these same functions across multiple zones and schedules.
Networked lighting controls make retrofit zoning much easier. Instead of rewiring fixtures, you can assign them to different control zones in software.
They also support scheduling and utility demand response. When demand response is required, these systems can reduce lighting load by at least 15%.

Once the controls are picked, code compliance comes down to three things: zoning, testing, and paperwork.

Compliance is usually checked one space at a time. During plan review, each room type gets its own check for LPD, shutoff, and daylight controls. Inspectors look at whether occupancy sensors, daylight dimming, and zone assignments match the space type shown on the drawings, not just whether the devices were installed.
That matters because different spaces trigger different control rules. Enclosed offices, open-plan areas, conference rooms, and restrooms are all reviewed on their own. If a lighting alteration goes over 2,000W, the project has to meet both LPD limits and mandatory control rules.
Even then, passing on paper isn't enough. The zoning only works if the programmed settings match what was built in the field.
Commissioning means performing a lighting assessment to test each zone by hand. That includes sensor coverage, timeout behavior, daylight dimming response, schedule triggers, and override functions.
For daylight sensors, a good starting point is 200–300 lux at desk height, followed by tuning over two weeks. After commissioning, schedules and dimming limits should be locked or password-protected so no one makes unauthorized changes that push the system out of compliance.
Those test results then feed straight into the closeout package. This documentation is a critical part of our proven process for ensuring long-term compliance.
| Document Type | Purpose | Key Details to Include |
|---|---|---|
| Sequence of Operations (SOO) | Inspection and audit reference | Zone logic, occupancy modes, schedule triggers |
| Zoning Diagrams | Map of sensor locations and circuit groups | Sensor locations, fixture groupings, circuit assignments |
| Commissioning Report | Proof of verified settings | Time delays, lux setpoints, partial-off levels tested |
| Compliance Worksheets | Legal proof of code adherence | LPD calculations, mandatory control checklists |
| Submittals and Spec Sheets | Hardware verification and performance records | DLC listings, LM-79/80 reports |
| Acceptance Test Forms | Functional verification record | Sensor and dimming response test results |
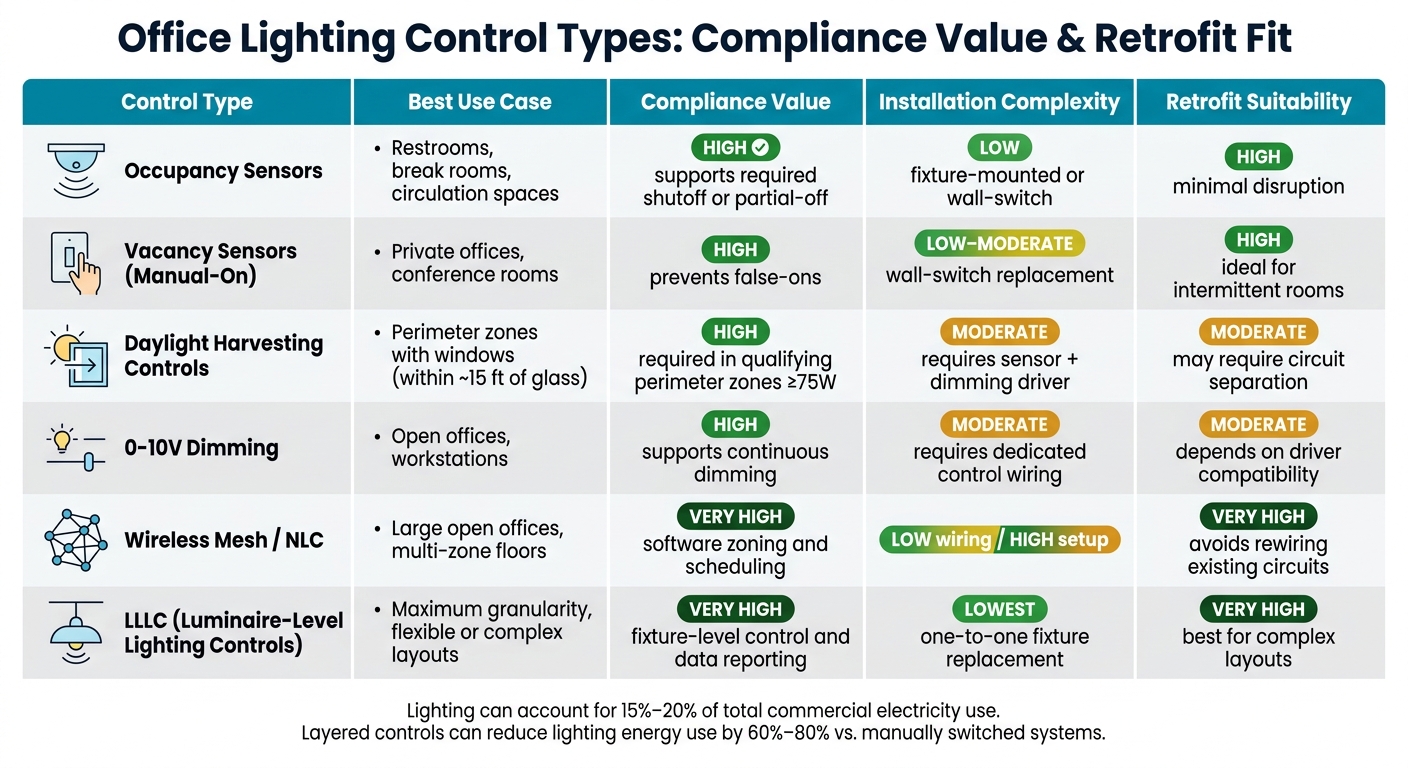
Office Lighting Control Types: Compliance Value & Retrofit Fit
Once you know which control types you want to use, the next step is pairing them with the right rooms and circuits. That means looking at the room type, how people move through the space, and what kind of shutoff or dimming behavior the area needs.
If you're choosing standalone sensors, the layout of the room matters just as much as the spec sheet. PIR sensors work best in small enclosed offices where they have a clear line of sight. Microwave sensors are a better fit in spaces with partitions or cubicles that can block motion detection.
Perimeter zones that get daylight also need their own dimmable control zones. If window-side fixtures and interior fixtures behave the same way, you lose a lot of the point of daylight-based control.
After the room plan is set, check whether the fixtures already in place can support it. This is where many retrofit plans hit a wall.
For example, 0-10V dimming needs a dedicated pair of low-voltage control wires that stay separate from line voltage. Older buildings may not have that wiring at all. And pulling new wire through finished ceilings isn't a small task. It can be messy, disruptive, and expensive.
If rewiring isn't realistic, wireless mesh controls like Bluetooth Mesh can avoid the need for control wiring and let you rezone through software. That's a big deal when perimeter and interior fixtures share one circuit but need to be split into separate daylight zones.
For one-to-one fixture replacement, luminaire-level lighting controls (LLLC) can make the install much simpler. These fixtures come with built-in sensors and wireless communication, which gives you fixture-by-fixture control and data reporting with the lowest installation complexity.
Before moving ahead with a controls-only upgrade, confirm that the existing LED drivers are 0-10V compatible. If they aren't, you'll need to replace the drivers or the fixtures themselves. At that point, the project scope and budget can change fast.
Use the table below to compare code value, wiring needs, and retrofit fit.
| Control Type | Best Use Case | Compliance Value | Installation Complexity | Retrofit Suitability |
|---|---|---|---|---|
| Occupancy Sensors | Restrooms, break rooms, circulation spaces | High - supports required shutoff or partial-off behavior | Low - fixture-mounted or wall-switch | High - minimal disruption |
| Vacancy Sensors (Manual-On) | Private offices, conference rooms | High - helps prevent false-ons | Low to moderate - wall-switch replacement | High - ideal for intermittent rooms |
| Daylight Harvesting Controls | Perimeter zones with windows | High - required in qualifying perimeter zones | Moderate - requires sensor + dimming driver | Moderate - may require circuit separation |
| 0-10V Dimming | Open offices, workstations | High - supports continuous dimming | Moderate - requires dedicated control wiring | Moderate - depends on driver compatibility |
| Wireless Mesh / NLC | Large open offices, multi-zone floors | Very High - enables software zoning and scheduling | Low wiring / high initial setup | Very High - avoids rewiring existing circuits |
| LLLC | Maximum granularity, flexible layouts | Very High - maximum granularity and data reporting | Lowest - one-to-one fixture replacement | Very High - best for complex layouts |
Once you know which controls the code calls for, the retrofit turns into a sequencing job. The goal is simple: match each control function to the right space type.
For most office retrofits, the most direct path is to layer 0-10V dimming, occupancy control, and networked scheduling. That setup covers a lot of ground without making the project harder than it needs to be. At the same time, you still need to include local manual switches, automatic shutoff, and daylight-responsive dimming in the zones where code requires them.
A practical way to think about it:
When these controls work together, lighting energy use can drop by 60%–80% compared with manually switched systems.
After you choose the control stack, the next step is field planning. On large open floors or in multi-zone layouts, adding a Networked Lighting Control (NLC) layer gives you software-defined zoning and scheduling without pulling new wire.
Start with an energy audit. Then map each space to the control type it needs before you pick hardware. Once the zones are set, choose the control protocol: 0-10V for simpler zones, or wireless mesh when rewiring isn't practical.
Next, draft a Sequence of Operations (SOO). This is a written narrative that spells out exactly how each space responds to occupancy, daylight, and schedule. Inspectors often want to see it along with a zone schedule and sensor coverage map.
From there, move into field testing. After installation, commission the system, test it, and lock the schedules and trim limits before handoff.
A code-ready office retrofit needs controls, zoning, commissioning, and documentation. Fixture swaps alone won't get it done.
Most commercial office spaces need occupancy or vacancy sensors so the lights turn off on their own within 20 minutes after the space is empty.
This usually applies to spaces like:
For open office areas, control zones are usually capped at 600 square feet or less.
Start by taking inventory of your lighting system. Write down each fixture, along with its type and model number. Then check that model number against the DesignLights Consortium Qualified Products List.
Next, inspect the fixture for a dedicated pair of low-voltage control wires and confirm that it has a compatible driver. If the driver does not accept 0-10V control signals, the fixture will not support 0-10V dimming unless you upgrade it.
Prepare detailed design plans, professional certifications, commissioning reports, and as-built drawings. These documents help with permit approval and show that the installed system meets code.
For new construction, include functional (acceptance) testing documentation that shows the hardware and software were calibrated and programmed the right way. Rules can vary by jurisdiction, so check with your local authority having jurisdiction.


