.svg)
Regular maintenance of high-bay LED systems boosts efficiency, safety, and lifespan. Learn essential steps for optimal performance.
High-bay LED lighting systems are energy-efficient, but they require regular upkeep to maintain performance and safety in industrial environments. Dust, heat, and loose connections can reduce efficiency and lifespan. Here's what you need to know:
Pro Tip: Facilities with structured maintenance programs reduce downtime, lower costs, and improve safety. For complex setups, professional services can provide tailored solutions and compliance support.
When working with high-bay LED systems, safety should always come first. Maintenance in manufacturing environments can present unique risks, from electrical hazards to the complexities of working at height. Proper preparation not only ensures tasks are completed efficiently but also keeps both workers and equipment safe.
The first and most important step is to completely cut off power. Turn off the power at the circuit breaker or main panel, and then confirm there’s no voltage using a non-contact tester.
To prevent accidental power restoration during maintenance, follow lockout/tagout procedures. Secure the circuit breaker with a lock and attach a warning tag. Only the person who locked it should remove the lock after verifying that the work is finished and the area is safe.
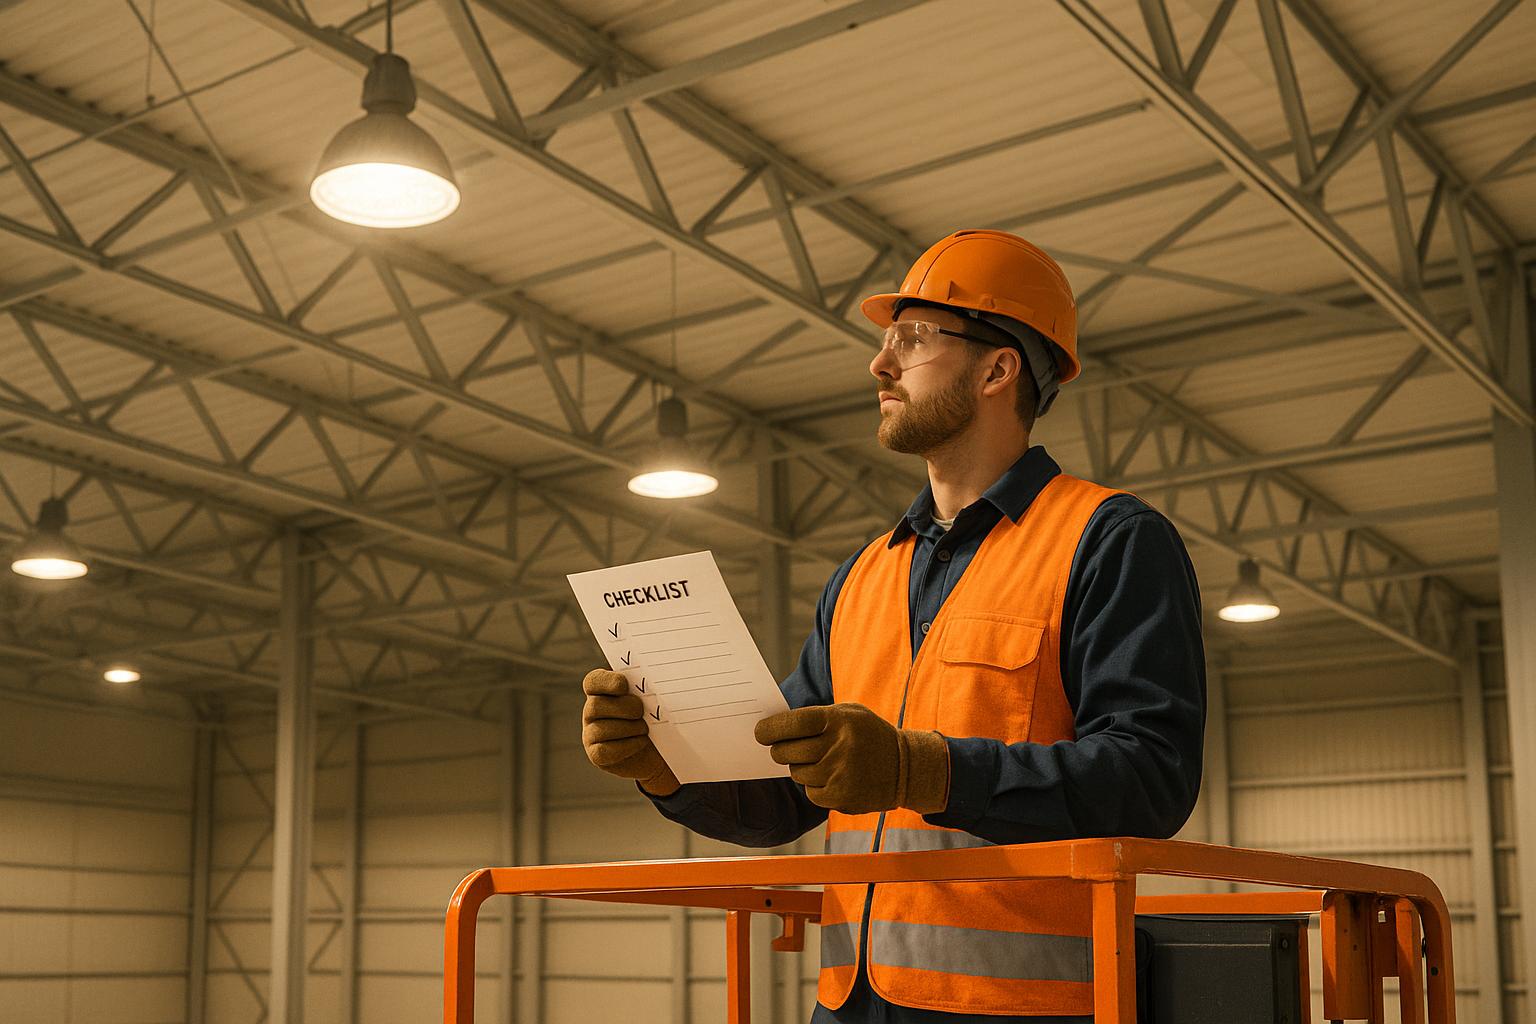
Always wear the right protective gear: insulated gloves, safety goggles, hard hats, and non-slip footwear. If you're using tools, opt for insulated ones for added electrical safety. In environments with dust or chemical exposure, consider using respiratory protection like a dust mask or respirator.
Having the right tools ready can save time and minimize risks. Use access equipment like ladders or scissor lifts rated for the required height and weight, ensuring they’re inspected and placed on stable, level ground.
For electrical testing, keep a multimeter on hand to measure voltage, current, and continuity, along with a non-contact voltage tester for initial checks. Insulated screwdrivers and other tools designed for electrical work are essential for safely handling fixture components.
When cleaning LED fixtures, use supplies specifically designed for the job. Soft microfiber cloths prevent scratches, and mild detergent solutions remove dust and grime without harming sensitive parts. Avoid abrasive materials or high-pressure sprays, which can damage LED chips or protective coatings.
Make sure replacement parts - like LED drivers, lenses, or mounting hardware - are readily available. This ensures that any issues discovered during maintenance can be addressed immediately.
LED fixtures can get very hot during operation, so allowing them to cool is critical. Follow the manufacturer’s guidelines, typically waiting 15–30 minutes before handling the fixtures. This cool-down period prevents burns and protects delicate electronic components.
Pay extra attention to heat sink areas, as they can retain heat longer than other parts of the fixture. Even if the fixture feels cool, test the surface temperature before touching any components.
If the environment has high temperatures or poor ventilation, cooling times may be longer. In such cases, take extra care to ensure the fixtures are safe to handle before moving forward. Once everything is cool and secure, you’re ready to inspect and clean the fixtures, as detailed in the next section.
Keeping high-bay LED lights in top shape requires regular inspections and cleaning. In manufacturing facilities, these lights are often exposed to dust, debris, and airborne particles that can dim their output or even cause overheating. A consistent maintenance routine can help avoid minor problems turning into expensive repairs.
Start by checking the fixture housing for any cracks, dents, or other physical damage. Industrial environments with constant vibrations, impacts, and temperature swings can weaken the structural integrity of these fixtures. Pay close attention to mounting hardware and connections - loose components may indicate wear or improper installation.
Look out for discoloration. Yellowing lenses, melted parts, or a burnt smell can point to overheating or electrical problems. Take photos and detailed notes of any discoloration for follow-up maintenance.
Inspect all electrical connections carefully. Watch for signs of arcing, like blackened areas, and ensure junction boxes are properly sealed. A flashlight can help you see into hard-to-reach spots, such as the rear of the fixture where heat sinks and additional electrical connections are typically located. Once the visual inspection is complete, move on to cleaning the lenses and heat sinks.
Dust buildup on LED lenses can cut light output by as much as 30%. Follow the manufacturer's instructions to remove the lenses for cleaning.
Use a lint-free cloth and a mild detergent solution to clean the lenses. Stay away from abrasive cleaners or high-pressure water, as these can damage the surface. For tougher grime, a microfiber cloth dampened with the cleaning solution works well to gently lift debris using circular motions.
Heat sinks are just as critical to clean since they help regulate temperature. Use a soft brush or compressed air to clear dust and debris from the fins, ensuring airflow passages stay open. Clean heat sinks prevent overheating and extend the life of the fixture.
Make sure all components are completely dry before reassembling. In humid environments, use a clean, dry cloth to remove any lingering moisture before reinstalling lenses and covers. Sticking to a regular cleaning schedule helps maintain consistent performance.
While most manufacturing facilities benefit from quarterly cleanings, specific schedules should account for the environment. For example, areas with high levels of dust, chemical exposure, or poor ventilation may need cleaning as often as monthly or even bi-weekly.
Quarterly cleaning alone can increase light output by up to 20%. Weekly visual inspections are also highly effective for catching issues early. Training maintenance staff to recognize damage or excessive dust buildup plays a big role in preventing major repairs.
| Environment Type | Recommended Cleaning Interval | Key Considerations |
|---|---|---|
| Light manufacturing | Quarterly | Standard dust levels; minimal airborne contaminants |
| Heavy manufacturing | Monthly | High dust levels; vibration and potential chemical exposure |
| Food processing | Bi-weekly to monthly | Hygiene requirements; moisture; cleaning chemicals |
Keep a detailed maintenance log that records inspection dates, findings, cleaning actions, and any repairs. Include fixture locations and serial numbers to simplify warranty claims, plan future maintenance, and meet safety standards. Consistent upkeep can extend the lifespan of LED fixtures by 25–50% compared to skipping routine care.
For facilities with very high ceilings, consider using extendable cleaning tools or telescopic poles. These tools allow safe access to fixtures without the need for ladders or lifts, improving safety and making routine cleaning more practical.
Once cleaning is complete, the next step is to test electrical systems and measure performance. This process helps identify safety risks and ensures that high-bay LED fixtures remain efficient and dependable.
Before you begin, turn off the power at the source and confirm it's off using a multimeter. Carefully inspect all electrical connections for signs of corrosion, loose wires, or damaged connectors. These issues are common in industrial settings where temperature changes and vibrations can wear down electrical components over time.
Be on the lookout for burn marks around connection points, as they can signal overheating or arcing. Frayed wires are a safety hazard and need immediate attention, while corroded terminals can lead to resistance, reducing efficiency and generating extra heat. Tighten any loose connections using insulated tools, but avoid over-tightening, which could damage the components.
Pay close attention to LED drivers, a frequent failure point in high-bay systems. Check for signs of overheating, such as discoloration or warping on the driver housings, and ensure all junction boxes are sealed properly to prevent moisture from getting in.
If you notice flickering, dimming, or non-responsive fixtures, it's time to call a licensed electrician.
"Our licensed electricians ensure full code compliance and minimal disruption to your operations".
Document any issues, noting their location and the date, before moving on to test the lighting controls.
Modern high-bay LED systems often come equipped with advanced lighting controls, such as motion sensors, dimmers, and timers. Regular testing of these components is crucial for maintaining consistent performance and energy efficiency.
Test motion sensors by walking through their detection zones and adjusting sensitivity if needed. For dimmers, check the brightness levels across their full range; transitions should be smooth without flickering. Review timer functions to ensure lights turn on and off as scheduled.
If the controls are integrated into a building management system, check the software interface to confirm all fixtures are online and responsive. Record any issues or failures, and replace faulty sensors or modules promptly to maintain system efficiency.
Keep detailed records of these tests, including calibration dates and any adjustments made. Over time, this data can help identify patterns that may suggest the need for system upgrades or replacements.
Use a lux meter to measure the illumination in key areas like workstations and aisles, ensuring compliance with OSHA/IES standards. Pay special attention to areas with uneven lighting identified earlier, and document zones with inadequate light levels or noticeable variations. These could point to fixture misalignment or component wear.
Monitor energy consumption using energy meters or building management systems. Track both real-time and historical usage to spot unusual spikes or drops, which might signal malfunctioning fixtures or controls. Compare current energy use to baseline data from previous periods to evaluate overall system performance.
Well-maintained LED systems can deliver energy savings of 50–70% compared to older lighting technologies, but only with consistent performance checks. If energy use rises without changes in operating hours or facility activity, investigate potential causes like failing drivers or control system issues.
"Our team excels at conducting comprehensive energy audits on current lighting fixtures and devising precise estimates of potential energy savings".
Consider scheduling professional energy audits for a deeper analysis and to uncover additional opportunities for improvement.
Establish a testing routine that includes monthly inspections for electrical components and quarterly checks for light levels and controls. Facilities in harsher environments may need more frequent testing to ensure safety and peak performance.
Keeping high-bay LED systems running smoothly requires timely component replacements and upgrades. Instead of waiting for complete failures that could disrupt operations, proactive facilities rely on performance data and manufacturer guidelines to schedule replacements. Documenting these observations ensures precise planning for both replacements and system upgrades.
LED drivers play a key role in high-bay lighting systems. Typically, these need replacing every 5–7 years, depending on usage and environmental conditions, with replacement costs ranging from $30 to $80 per driver. Signs of a failing driver include flickering, dimming, or total failure. Physical issues like discoloration, damaged connectors, or corrosion should also prompt action. Heat damage might appear as warping or melted areas around the driver, while moisture issues often show up as rust or white corrosion on terminals.
Control modules, which manage dimming, occupancy sensing, and system integration, usually last 5–10 years and cost $50–$120 to replace. If sensors stop responding or dimming functions become erratic, replacing the module is often more practical than attempting repairs.
Facilities running 24/7 benefit from a rolling 12–24 month replacement plan. This approach ensures continuous operation by upgrading components in specific zones or areas systematically. When immediate replacements are necessary, prioritize components posing safety risks, such as exposed wires, cracked connectors, or overheating. However, less critical issues like gradual dimming (less than 20% output loss) or minor dust buildup can often wait for scheduled maintenance.
Detailed record-keeping is crucial for protecting warranties and making data-driven decisions about replacements. A maintenance log should include the service date, a description of the work, parts replaced (with model and serial numbers), technician details, operating hours at the time of service, and any performance metrics. Such records not only safeguard warranties but also support safety and operational reliability.
Warranty documentation is equally important. Track the original purchase date, installation date, and warranty expiration for each fixture and component. Most LED fixtures have warranties lasting 5–10 years for the housing and 2–5 years for drivers and electronics. Without proper documentation, even valid warranty claims could be denied.
Digital maintenance systems can send automatic reminders based on usage hours or calendar intervals. Adding photos of damage or issues found during inspections strengthens warranty claims and offers technicians visual references for recurring problems.
Facilities that maintain thorough records often see 30% less downtime and extend fixture lifespans by an average of 20% compared to those with minimal documentation. Proper logs also ensure replacement components meet manufacturer specifications and are certified by reputable labs like UL or ETL. Adhering to standards such as the National Electrical Code (NEC) and OSHA regulations further highlights the importance of meticulous record-keeping.
Replacing failing parts is one route, but upgrading your lighting system can deliver greater efficiency. Advanced systems with smart controls - like occupancy sensors, daylight harvesting, and dimming features - can cut energy use by 20–40% compared to standard fixtures running at full brightness. These systems adjust light levels automatically based on occupancy and natural light, reducing energy costs in spaces with fluctuating usage.
The choice between replacing components and upgrading the entire system depends on several factors. If a fixture is less than halfway through its 50,000–100,000 hour lifespan and only the driver needs replacing, a repair is often more cost-effective. However, when multiple components are failing, or the fixture is over 10 years old, upgrading to a new system may offer better long-term value.
Calculating the payback period is essential. Upgraded systems can slash energy bills by 40–60%, often paying for themselves within 2–4 years.
Smart controls add even more value by enabling real-time monitoring and analytics. Facility managers can track energy use, identify underperforming fixtures, and optimize maintenance schedules from a central dashboard. For large facilities, phased upgrades - starting with high-usage areas - can spread costs over 18–36 months while easing staff adjustments.
Utility rebates and tax incentives, like the 179D tax deduction in the United States, can make upgrades even more appealing, boosting return on investment by 20–40%.
Companies like Luminate Lighting Group offer comprehensive retrofit solutions, handling everything from design and installation to permitting and rebate management. Their approach ensures code compliance and minimizes disruptions during the transition.
To confirm ROI, track energy use and maintenance costs before and after upgrades. Lower utility bills and reduced downtime will reflect the benefits of your investment.
Manufacturing facilities come with their own set of challenges. The environment often includes dust buildup, constant vibration from heavy machinery, high temperatures, and exposure to chemicals or moisture. These factors make it crucial to carefully choose fixtures and establish a maintenance routine that accounts for these conditions. Standard LED fixtures designed for offices or retail spaces often fall short in such demanding settings, requiring more durable designs and customized upkeep.
Dust and debris can severely impact the performance of high-bay LEDs. These particles not only reduce light output but also form an insulating layer on heat sinks, causing fixtures to overheat and wear out faster. Dust buildup can noticeably decrease light efficiency. To counter this, cleaning schedules should be adjusted based on the level of dust and chemical exposure (as outlined in cleaning intervals above). Use soft cloths or brushes for cleaning, and steer clear of abrasive cleaners.
Vibration from machinery is another concern. Constant vibrations can loosen electrical connections, weaken mounting hardware, and lead to early failure of components. Regular inspections and the use of vibration-dampening mounts can help prevent these issues.
High temperatures are particularly harsh on LED chips, shortening their lifespan. Effective heat management includes selecting fixtures with large, efficient heat sinks, ensuring proper airflow, and avoiding installation near heat sources like furnaces or steam equipment. Monitoring ambient temperature and opting for LEDs designed for higher operating temperatures can make a significant difference.
Chemical exposure adds another layer of complexity. Vapors or splashes can corrode housings, damage seals, and harm electrical components. Positioning fixtures away from direct chemical exposure and increasing inspection frequency in areas with heavy chemical use can mitigate damage. For instance, a Midwest automotive parts manufacturer cut lighting downtime by 40% after switching to IP66-rated, vibration-resistant fixtures and adopting a quarterly inspection schedule.
To handle these challenges, it's essential to choose fixtures built for industrial environments. Fixtures rated IP65 or higher are ideal. IP65-rated models are dust-tight and resistant to water jets, making them suitable for areas with dust, moisture, or occasional washdowns. In environments with heavy chemical use or high-pressure cleaning, IP66 or IP67-rated fixtures may be more suitable.
The construction of the fixture also matters. Look for features like die-cast aluminum housings, shatter-resistant lenses, sealed gaskets, and corrosion-resistant finishes.
| Feature | Standard LED Fixture | Industrial High-Bay LED (IP65+) |
|---|---|---|
| Dust Protection | Low | High |
| Water Resistance | Minimal | Protected against water jets |
| Heat Management | Basic | Advanced heat sinks |
| Chemical Resistance | Limited | Corrosion-resistant materials |
| Maintenance Frequency | Annual | Monthly/Quarterly |
Heat management is particularly critical in manufacturing environments where temperatures often exceed those in office settings. Fixtures with oversized heat sinks and thermal management systems designed for continuous operation in high temperatures are key to maintaining performance.
Facilities that invest in industrial-grade fixtures and adhere to regular maintenance schedules report up to 20% longer fixture lifespans and 15–25% lower energy costs due to sustained efficiency. Cleaning and inspection intervals should be tailored to the environment - monthly for areas with heavy dust or chemical exposure and quarterly for less severe conditions. Keeping a maintenance log to track inspections, repairs, and replacements can help identify patterns and ensure compliance with safety standards.
Organizations like Luminate Lighting Group specialize in energy-efficient LED retrofits and custom lighting solutions for industrial and warehouse settings. Their expertise helps businesses choose durable fixtures, streamline maintenance schedules, and take advantage of utility rebates and tax deductions available in the U.S.
Lastly, regularly monitor fixture temperatures and ensure proper ventilation to prevent overheating. Engaging professional services for periodic electrical safety checks and compliance audits helps maintain safety and performance standards. The right combination of durable fixtures and a well-planned maintenance routine ensures reliable lighting and a safer working environment.
Professional maintenance goes beyond the basics of routine inspections and cleaning, offering the advanced support necessary for sustained efficiency. While in-house teams handle day-to-day tasks, professional specialists bring a higher level of expertise, including advanced diagnostics, customized maintenance strategies, and technical know-how that most facilities simply cannot match.
Professional maintenance teams develop maintenance schedules tailored to your facility's unique needs. By considering factors like operational demands and environmental conditions, they aim to maximize uptime and reduce costs. These teams also ensure compliance with OSHA regulations and building codes through regular inspections and meticulous documentation, helping to avoid costly violations.
What sets professional services apart is their use of advanced diagnostic tools. Specialists rely on equipment like thermal imaging cameras, specialized light meters, and digital maintenance management systems to monitor fixture performance and identify electrical issues before they escalate. This proactive approach allows repairs to be scheduled during planned downtimes, reducing disruptions. Facilities that adopt such measures often experience up to 30% fewer lighting-related work stoppages, along with improved safety metrics. These benefits are especially crucial for facilities with complex operational requirements.
A great example of professional maintenance in action is Luminate Lighting Group, which tailors its services to the specific needs of each facility. They start with a detailed lighting audit to identify inefficiencies and potential energy savings. By documenting existing fixtures and calculating projected savings, they design custom LED retrofit solutions that not only lower utility costs but may also qualify for financial incentives like the 179D tax deduction.
Their services don’t stop at installation. Post-installation support includes maintenance recommendations based on the specific upgrades made and the facility’s unique demands. Luminate Lighting Group also handles warranty records and schedules proactive component replacements, easing the administrative workload for facility managers. As technology evolves, they may suggest upgrades to advanced lighting controls or more efficient fixtures to keep facilities up to date.
In complex environments like manufacturing plants, these specialists offer comprehensive solutions that cover everything from design and installation to permitting and rebate submissions. Their expertise in energy-efficient retrofits, custom lighting design, and energy audits is particularly valuable in industrial and warehouse settings where lighting needs can be challenging. Beyond energy savings, professional services can unlock utility rebates and federal tax deductions, such as the 179D deduction, adding even more value to maintenance and upgrade projects.
Effective maintenance isn’t just about keeping high-bay LED lights functioning - it’s about protecting your investment and ensuring consistent performance. By following a structured process that includes safety precautions, cleaning, inspections, testing, and record-keeping, you can maintain reliable illumination that directly supports productivity and workplace safety.
Maintenance starts with critical safety measures: turning off the power, using proper protective gear, and allowing fixtures to cool before handling. These steps are essential to prevent accidents and avoid damaging equipment during routine upkeep.
Cleaning and inspection procedures, outlined in earlier sections, play a key role in maintaining peak performance. Electrical testing ensures systems operate efficiently by checking connections, testing controls, and measuring light levels. A structured approach to maintenance not only minimizes downtime but also reduces energy costs.
The process concludes with component replacement and record-keeping. By tracking inspection dates, cleaning schedules, and warranty details, you can identify recurring issues and plan ahead for proactive maintenance.
This systematic approach ensures your lighting systems remain reliable and efficient, offering long-term operational benefits.
For manufacturing facilities, the benefits of regular maintenance are clear: uninterrupted operations and improved safety. Proper upkeep turns LED lighting into a strategic asset. With lifespans reaching up to 100,000 hours, well-maintained LEDs significantly lower replacement costs and deliver substantial energy savings over time.
Routine maintenance helps sustain energy savings of 50–80% compared to outdated lighting systems. Regular cleaning of heat sinks and lenses prevents heat buildup - a common cause of premature LED failure - and ensures continued energy efficiency.
High-quality, consistent lighting reduces workplace accidents and enhances visibility, keeping production schedules on track and minimizing unexpected disruptions.
For facilities seeking additional support, professional services can amplify these advantages. Companies like Luminate Lighting Group offer customized maintenance programs and energy audits, helping businesses cut energy costs while staying compliant with regulations. They also assist with energy-efficient retrofits, unlocking savings through utility rebates and tax incentives like the 179D deduction.
"After installation, we test all lighting systems, provide warranty information, and remain available for maintenance guidance. We're committed to long-term performance and energy savings for your business." – Luminate Lighting Group
Investing in regular maintenance delivers measurable returns through sustained lighting performance, reduced operational costs, and enhanced facility safety. It’s an essential part of any manufacturing facility’s strategy to maintain efficiency and productivity.
Ensuring safety while maintaining high-bay LED lighting in industrial settings is non-negotiable. Start by turning off the power to the lighting system to eliminate any risk of electrical hazards. Equip yourself with the right personal protective equipment (PPE), such as gloves and safety glasses, to shield against potential injuries. If you’re using ladders or lifts to access the lights, make sure they’re stable and securely positioned.
For tasks involving heights, adhere to OSHA guidelines for fall protection. This might include using harnesses or other safety gear when required. Before diving into maintenance, take a moment to inspect the fixtures and surrounding areas for signs of damage, loose wiring, or structural problems. Following a routine maintenance schedule and sticking to safety procedures doesn’t just protect workers - it also keeps the lighting system performing at its best.
Keeping your high-bay LED lighting in top shape is key to getting the most out of your investment. Regular maintenance not only ensures they perform at their best but also helps you save energy and extend their lifespan. By cleaning and maintaining your LED systems, you can prevent problems like dust buildup and overheating, which can lower efficiency.
LEDs already cut energy use by 50–80%, but consistent care makes sure those savings last. Plus, proper upkeep reduces the need for expensive replacements, making it a practical choice for boosting energy efficiency and saving money over the long haul.
When weighing the choice between repairing older components or switching to advanced high-bay LED systems, it’s essential to look at factors like energy efficiency, light quality, and maintenance requirements. Modern LEDs can slash energy costs, deliver better lighting, and reduce ongoing maintenance efforts.
There’s more to consider, too. Upgrading can lead to improved workplace safety, ensure compliance with energy regulations, and even open the door to utility rebates or tax incentives. These advanced systems often deliver better performance and long-term savings, making them a practical and forward-thinking option for many manufacturing facilities.


