.svg)
Targeted beam patterns and photometric planning eliminate dark spots, boost camera facial recognition, and cut energy use up to 70%.

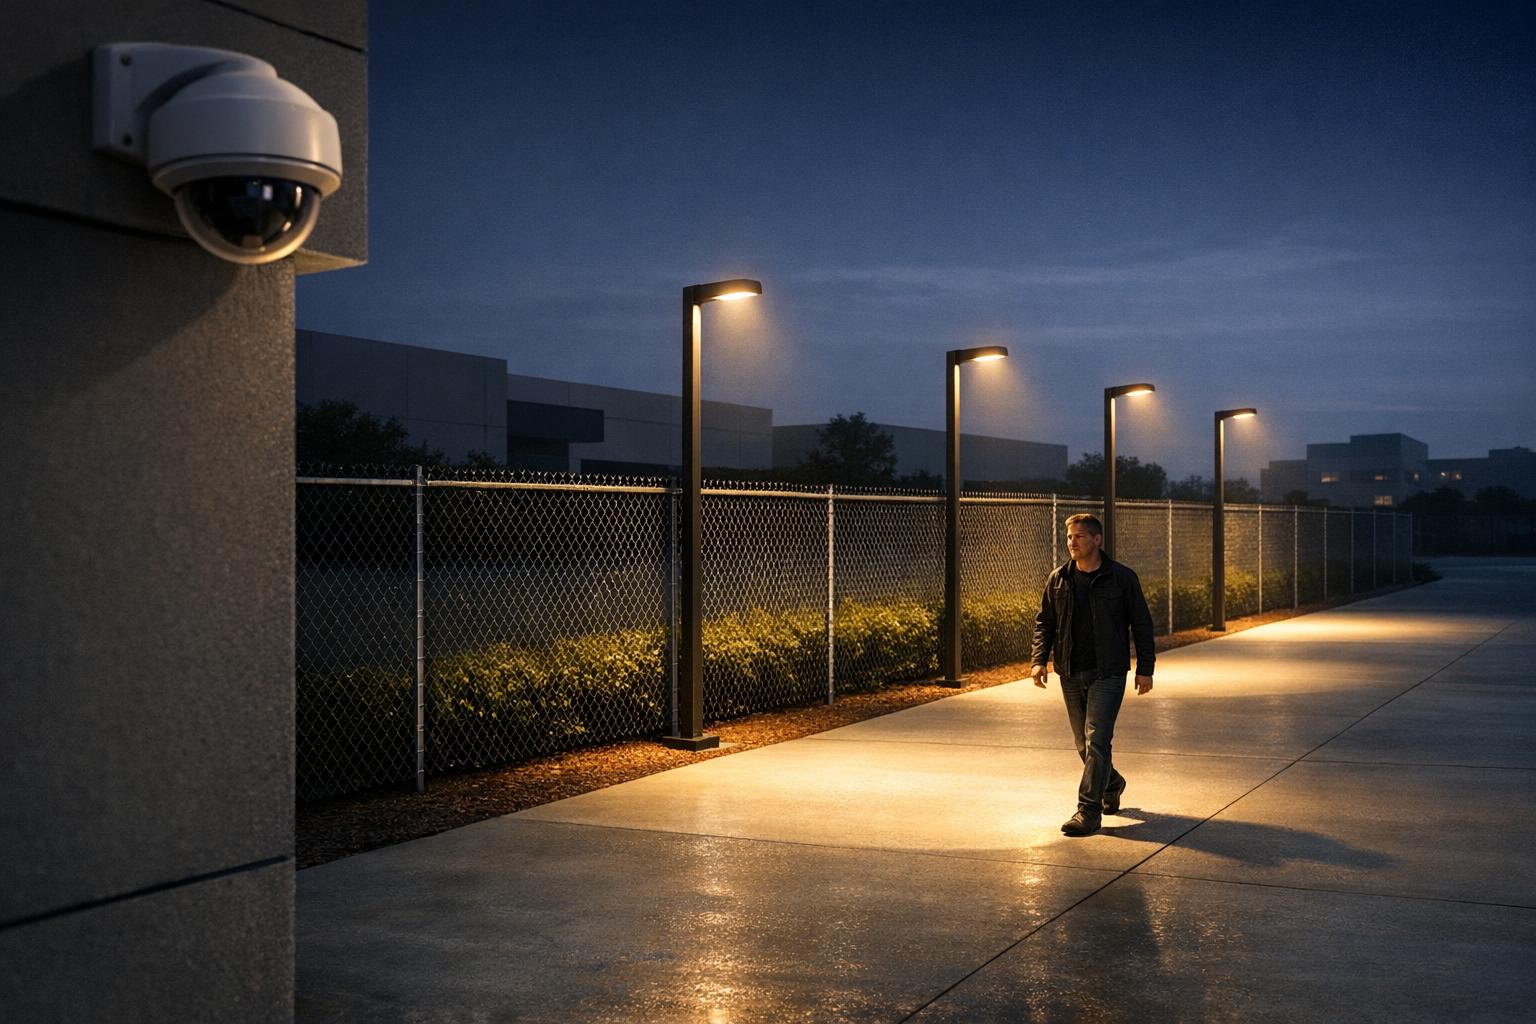
Poor lighting creates blind spots, making properties vulnerable to intruders. Custom light distribution solves this by focusing illumination where it's needed most, improving visibility and security while reducing costs. Here's how it works:
Custom lighting also integrates seamlessly with cameras and motion sensors, enhancing detection and reducing false alarms. By combining precise photometric planning with advanced technology, you can secure your property effectively and affordably.
Custom light distribution tackles the "zebra stripe" effect - those alternating bright and dark zones that can provide cover for intruders. Traditional pole-mounted lights spaced 100 feet apart often leave dangerous gaps, but custom photometric designs use specific beam patterns to ensure overlapping coverage, eliminating these vulnerabilities.
To maintain security, it’s essential to achieve a uniform 4:1 light ratio (maximum to minimum light levels) across the area. This prevents dark seams between fixtures where someone could go undetected. The right spacing-to-mounting-height (S/MH) ratios - usually between 1.5:1 and 2:1 - help adjacent beams overlap effectively. Fixtures spaced 20–30 feet apart create redundancy, so even if one light fails, the surrounding fixtures maintain sufficient coverage to avoid security lapses .
Custom layouts also enhance facial recognition by focusing light on vertical surfaces, not just the ground. According to the IESNA, a vertical illuminance of at least 5.0 lux is needed for facial identification, while just 1 lux provides a 90% chance of detecting an approaching person. Mounting fixtures at heights of 12–20 feet and using forward-throw optics solves the shadow issues common with traditional high-pole lighting.
This overlapping design benefits security personnel, too, by reducing eye strain. Consistent light levels prevent their eyes from constantly adjusting between bright and dark areas. Beyond enhancing security, this efficient illumination also sets the stage for energy savings.
Custom lighting solutions can significantly cut energy costs while maintaining security standards. By switching from broad symmetric floodlights to Type IV forward-throw patterns, fixture counts can drop by 15–30%, all while improving uniformity. Fewer fixtures mean savings on installation, maintenance, and energy use.
For example, in July 2013, Pennsylvania State University upgraded its campus construction perimeter lighting to the CAST Lighting LED Perimeter Lighting System. They replaced 27-watt CFLs spaced every 10 feet with 7-watt LEDs spaced every 20 feet. This change slashed energy consumption from 2.7 watts per foot to just 0.35 watts per foot - an 87% energy reduction. The university also cut labor costs by 80%.
"The ease of installation, portability to other job sites, increased illumination levels, enhanced safety and security, all at reduced energy consumption makes this type of application a win-win for everyone involved." - Jeff Kokoskie, PE, Manager of Construction Services, The Pennsylvania State University
Custom optics focus light where it’s needed, avoiding wasted energy on areas like the sky or building facades. Low-voltage, fence-mounted systems can bring installation and operation costs down from over $80,000 (common with traditional pole lights) to around $20,000. Smart controls, such as photocells and motion sensors, add further efficiency by keeping lights at 30–50% power during quiet periods and ramping up to 100% only when activity is detected.
Together, better coverage and reduced energy use lay the groundwork for integrating advanced photometric planning with cutting-edge security technologies, which will be discussed in the next section.
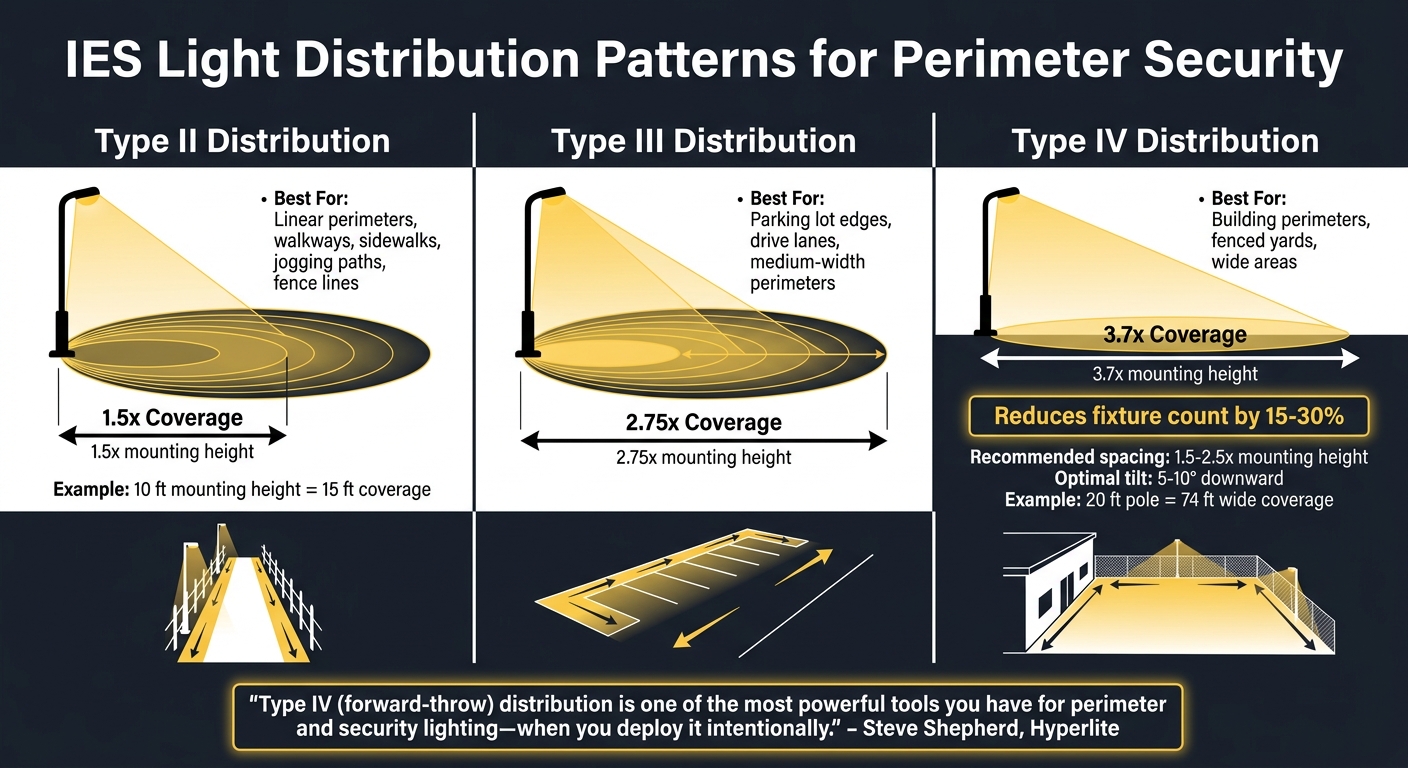
IES Light Distribution Patterns for Perimeter Security: Type II, III, and IV Comparison
To achieve better coverage and energy efficiency, selecting the right beam pattern is critical for perimeter security. Security lighting relies on specific beam patterns, and the Illuminating Engineering Society (IES) has classified light distribution into five types. For perimeter security, Type II, Type III, and Type IV patterns provide the most effective coverage. On the other hand, Type V, which emits a symmetrical, all-directional spread, is better suited for large open spaces like the center of parking lots.
The geometry of your perimeter determines which pattern works best. A narrow fence line, for example, requires a different lighting approach than a wide loading yard. Selecting the wrong pattern can lead to wasted energy by illuminating unnecessary areas or, worse, leaving dark gaps where intruders could hide.
Type II distribution creates a long, narrow oval of light, making it perfect for linear spaces like walkways, sidewalks, and jogging paths. This pattern spreads light laterally along the path, covering an area approximately 1.5 times the mounting height. For instance, a fixture mounted at 10 feet provides about 15 feet of coverage.
This distribution works best when fixtures are installed along the edges of a boundary, such as fences or sidewalks adjacent to buildings.
Type III distribution offers an asymmetric pattern that projects light forward and laterally. It covers an area roughly 2.75 times the mounting height, making it ideal for parking lot edges and drive lanes.
Type IV distribution goes a step further, extending the forward throw in a semicircular pattern. Most of the light is directed away from the mounting point, reducing backlight. This type is particularly effective for building perimeters and fenced yards, covering an area about 3.7 times the mounting height. For example, a 20-foot pole with Type IV optics can light a zone approximately 74 feet wide.
"Type IV (forward-throw) distribution is one of the most powerful tools you have for perimeter and security lighting - when you deploy it intentionally." - Steve Shepherd, Hyperlite
Switching from broad, symmetric floodlights to Type IV optics can cut the number of fixtures needed by 15–30% while improving light uniformity. For continuous perimeter coverage, space Type IV fixtures at 1.5–2.5 times the mounting height. For instance, a 25-foot pole should be installed 38 to 63 feet apart.
To maximize effectiveness, aim the fixture using its candela lobe (the point of peak intensity) rather than relying on how bright a wall looks. A slight downward tilt of 5–10° ensures the light is directed into the secured zone, reducing glare. This precise targeting focuses light where intruders are most likely to move, rather than wasting it on building walls or the sky. Understanding these patterns is essential for designing effective perimeter lighting and creating custom photometric plans.
Designing a custom photometric plan is all about creating precise, tailored lighting that balances effective coverage with practical security needs. By focusing on specific illumination levels - like detection (5–15 lux), recognition (30–50 lux), and identification (100–200 lux) - you can ensure the lighting meets your exact requirements. Here’s a step-by-step guide to crafting a plan that delivers optimal results.
Start by identifying high-risk zones and noting any obstacles, such as trees or architectural elements, that might create shadows. Key areas like entrances, loading docks, and access points typically need at least 10 foot-candles at ground level, while general property perimeters usually require 3–6 foot-candles.
Mounting height plays a big role in both coverage and brightness. Taller poles (20–30 feet) cover larger areas but may reduce intensity at ground level. Conversely, fixtures mounted below 12 feet provide brighter light but can cause glare and are more prone to vandalism. To avoid dark seams, use an S/MH ratio (Spacing to Mounting Height) of 1.5:1 to 2:1 for overlapping light pools.
Don’t forget about vertical illumination. High-mounted lights often only illuminate the tops of people’s heads, so ensure the design provides enough light for facial recognition, especially for camera systems.
| Mounting Height (MH) | Recommended Spacing (1.5:1 Ratio) | Maximum Spacing (2:1 Ratio) |
|---|---|---|
| 12 ft | 18 ft | 24 ft |
| 15 ft | 22.5 ft | 30 ft |
| 18 ft | 27 ft | 36 ft |
| 20 ft | 30 ft | 40 ft |
Once zones are mapped, select LED fixtures with adjustable optics. These allow you to direct light precisely where it’s needed, such as on vertical surfaces for better facial recognition. Aim for at least a 30% overlap between adjacent fixtures to ensure consistent coverage, even if one light fails.
Adjustable optics also help eliminate unlit areas and overly bright spots that can cause glare. For camera systems, targeted beams reduce image noise, potentially cutting digital storage needs by 50% to 100% compared to footage captured in low-light conditions. Both the human eye and 2-megapixel cameras perform best at light levels of 2 to 4 lux.
"A well-placed 8,000-lumen wall pack with proper photometrics will always outperform a poorly aimed 15,000-lumen fixture that creates hot spots and deep shadows." - Steve Shepherd, Lighting Professional
Use IES files (following the IES LM-63-19 Standard) in design software to simulate how your chosen fixtures will perform. Input details like mounting heights, fixture types, and beam angles to confirm that the design meets your target illuminance levels. General perimeters should have 3–6 foot-candles at ground level, while high-risk areas need 10 foot-candles or more.
To maintain consistency, calculate the uniformity ratio by dividing the maximum light level by the minimum. A target ratio of 4:1 prevents alternating bright and dark areas, which could create hiding spots. Traditional pole lighting often shows significant light level drops, from around 20 lux directly under the source to just 0.05 lux at the edges.
After installation, use a light meter to verify that the actual coverage matches your design.
Proper pole placement is key to avoiding dark gaps. Use the S/MH ratio from Step 1 as a starting point, adjusting spacing based on your fixtures’ distribution type. For example, Type IV fixtures work best when spaced 1.5–2.5 times the mounting height for continuous coverage.
A slight down-tilt of 2 to 10 degrees can shift the light pool away from the building’s foundation and improve uniformity on the ground. Use live video feeds to fine-tune fixture aiming and minimize glare. In some cases, you can create a "glare zone" (22 to 45 feet from the fence) to temporarily impair an intruder’s vision while ensuring security personnel have a clear, glare-free view. This approach turns lighting into both a detection tool and a deterrent.
Once pole placement and coverage are perfected, the next step is integrating your lighting setup with advanced security systems.
Custom lighting works best when paired with modern security technology. Together, lighting, cameras, and sensors create a multi-layered defense system that detects threats and captures clear evidence. This integration doesn't just improve security - it also enhances how cameras and sensors perform, making threat detection more advanced and reliable.
For cameras to capture clear footage, consistent and focused lighting is essential. Traditional pole lighting often leaves dark areas between fixtures, allowing intruders to move unnoticed. Custom lighting setups solve this by providing 30% beam overlap between fixtures. This overlap eliminates blind spots and ensures cameras maintain proper exposure without struggling to adjust during transitions.
Vertical illumination plays a critical role in facial recognition. By directing light both downward and outward, custom optics ensure that faces are well-lit - even if someone is wearing a hat [[6]](https://castperimeter.com/blog/post/Perimeter-Intrusions-Lighting- First-Step-Security). According to the IESNA Security Lighting Committee, 5.0 lux of vertical illuminance is needed for reliable facial identification, while just 1 lux offers a 90% chance of detecting someone approaching.
"Having the right perimeter lighting can make it possible for your security cameras to capture that intruder's image in the best light possible (even better than only using night vision cameras!)" - CAST Perimeter Lighting [[6]](https://castperimeter.com/blog/post/Perimeter-Intrusions-Lighting- First-Step-Security)
Good lighting also reduces the strain on data storage. Bright, well-lit footage requires 50% to 100% less storage compared to noisy, low-light video. To prevent glare that can disrupt camera sensors, lights should be positioned 3–6 feet laterally from cameras and mounted 6–10 feet high. Using live video feeds during setup helps identify and fix any glare or hot spots immediately.
| Security Goal | Required Light Level | Typical Application |
|---|---|---|
| Detection | 5–15 lux | General monitoring; confirming presence of person/vehicle |
| Recognition | 30–50 lux | Recognizing a known person; entryways and pathways |
| Identification | 100–200 lux | Capturing detail to identify unknown individuals or read plates |
Beyond improving camera clarity, effective lighting works hand-in-hand with sensor technology to create a dynamic, responsive security system.
Pairing advanced sensors with customizable lighting strengthens perimeter security and ensures quick responses to potential threats. Motion-activated lighting not only deters intruders but also reduces energy consumption. Microwave (Doppler) sensors are particularly effective for outdoor use, as they resist interference from wind and temperature changes and can even detect movement through non-metallic barriers like fences.
One effective setup involves "Follow-Me" logic, where motion triggers lights to turn on sequentially with a 0.5–1.0 second delay between fixtures. This setup highlights an intruder's path, directing security attention where it’s needed. To conserve energy, set standby dimming levels at 20%, ensuring cameras still capture clear footage, and increase to full brightness when motion is detected.
A real-world example: In January 2026, Thach Nguyen Ngoc of Hyperlite documented a 500-meter industrial perimeter retrofit. The project replaced 40 outdated 400W Metal Halide fixtures with 150W LED fixtures featuring microwave controls. By incorporating "Follow-Me" logic and maintaining a 15% occupancy rate, the facility saved $14,569 annually on energy and $8,541 on maintenance. With an $8,000 utility rebate, the project paid for itself in just 4.2 months.
For optimal performance, mount sensors 8–12 feet above the ground and away from large metal surfaces to avoid signal interference or false alarms. Regularly trim vegetation to prevent trees or shrubs from blocking light or triggering unnecessary alerts. Using dual-technology sensors that combine PIR and microwave capabilities can cut false alarms by up to 90%.

Luminate Lighting Group combines detailed photometric planning with advanced sensor integration to create tailored solutions for perimeter security.
The team at Luminate Lighting Group crafts custom photometric plans by analyzing intrusion paths and shadow zones to eliminate potential hiding spots. Using IES files and specialized software, they simulate how fixtures will perform in real-world conditions. Their approach follows established practices, such as selecting the right IESNA distribution types - Type II for narrow pathways and Type III/IV for perimeters and parking lot edges - and optimizing mounting heights between 12 and 20 feet. This balance ensures strong ground-level lighting and broad coverage. Beyond design, they conduct thorough audits to ensure systems meet both performance standards and energy regulations.
To ensure compliance with ASHRAE 90.1 energy codes, Luminate Lighting Group conducts energy audits that pinpoint ways to cut energy use. They recommend low-voltage LED systems and dynamic follow-me lighting, which can achieve energy savings of 60–70% compared to older static systems. Their suggested fixtures are DLC Premium listed, making them eligible for rebates of up to $200 per fixture. Additionally, they adhere to the NEC "80% Rule" (Article 210), which ensures that lighting circuits operate below 80% of a breaker's capacity. This prevents nuisance tripping and ensures consistent lighting performance, a critical aspect of maintaining reliable security.
Luminate Lighting Group offers end-to-end support, from conducting threat assessments and energy audits to managing installation and ongoing maintenance. For organizations with multiple locations, they provide integrated multi-site capabilities. Their solutions seamlessly integrate with existing security systems, such as VMS recording systems, access control, and motion detection. Fixtures are strategically aimed with a 2 to 10-degree down-tilt to improve ground-level lighting uniformity. Additionally, all outdoor fixtures meet at least an IP65 rating for weatherproofing and an IK08 rating for impact resistance. This comprehensive approach ensures that perimeter lighting systems are reliable and effective from the moment they are installed.
Custom light distribution solves the issue of dark spots and shadows that are common with traditional pole lighting. A properly designed system achieves a uniformity ratio of 4:1, eliminating hidden "black holes" where intruders might conceal themselves. Additionally, switching to low-voltage, fence-mounted systems dramatically reduces costs - from over $80,000 to roughly $20,000.
The key to effective security lighting lies in strategic placement rather than overwhelming brightness. By mounting fixtures at heights between 12 and 20 feet, ensuring proper spacing, and using adjustable beam angles, you can enhance deterrence while cutting energy use by 60–70% compared to older static systems. A carefully crafted photometric plan ensures that cameras capture clear footage without excessive glare, improving both surveillance quality and safety for security teams.
To maximize these benefits, specialized design services play a crucial role. Luminate Lighting Group applies proven methods like uniform light distribution, cost-conscious designs, and precise installations to create customized perimeter lighting solutions. Their tailored plans address unique security challenges, integrate seamlessly with existing systems, and often qualify for utility rebates, speeding up the return on investment. From conducting energy audits to providing ongoing maintenance, their team ensures reliable performance and long-term savings.
Whether you’re safeguarding a warehouse, industrial site, or municipal property, the right lighting design is essential. Professional photometric planning eliminates guesswork, ensuring every inch of your perimeter is properly illuminated - avoiding wasted energy and security blind spots. In the end, a well-executed lighting strategy not only boosts security but also delivers measurable savings.
To determine the best IES distribution type for your lighting needs, think about the application and the light pattern you require:
Choose the type that aligns with your specific requirements while keeping glare and light spill to a minimum.
For detection, light levels between 1 and 3 foot-candles generally work well. When it comes to recognition, about 10 foot-candles are suggested to make objects more distinguishable. For identification, a minimum of 20 foot-candles is required to see finer details clearly. These guidelines help achieve the right visibility for each specific task.
To make nighttime camera footage clearer and reduce glare, it's important to focus on controlling light effectively and using the right fixtures. Opt for full-cutoff fixtures and carefully designed beam spreads to ensure light is directed exactly where it's needed while avoiding unnecessary glare. Aim for even light distribution and steer clear of steep angles from high-mounted lights, as these can cause shadows and harsh contrasts that make it harder to see. Thoughtfully designed lighting not only improves visibility but also minimizes discomfort for cameras.


