.svg)
Map and light full egress routes: meet 1.0 fc/0.1 fc, 90-minute runtime, <10-second transfer, avoid rack shadows, and test regularly.

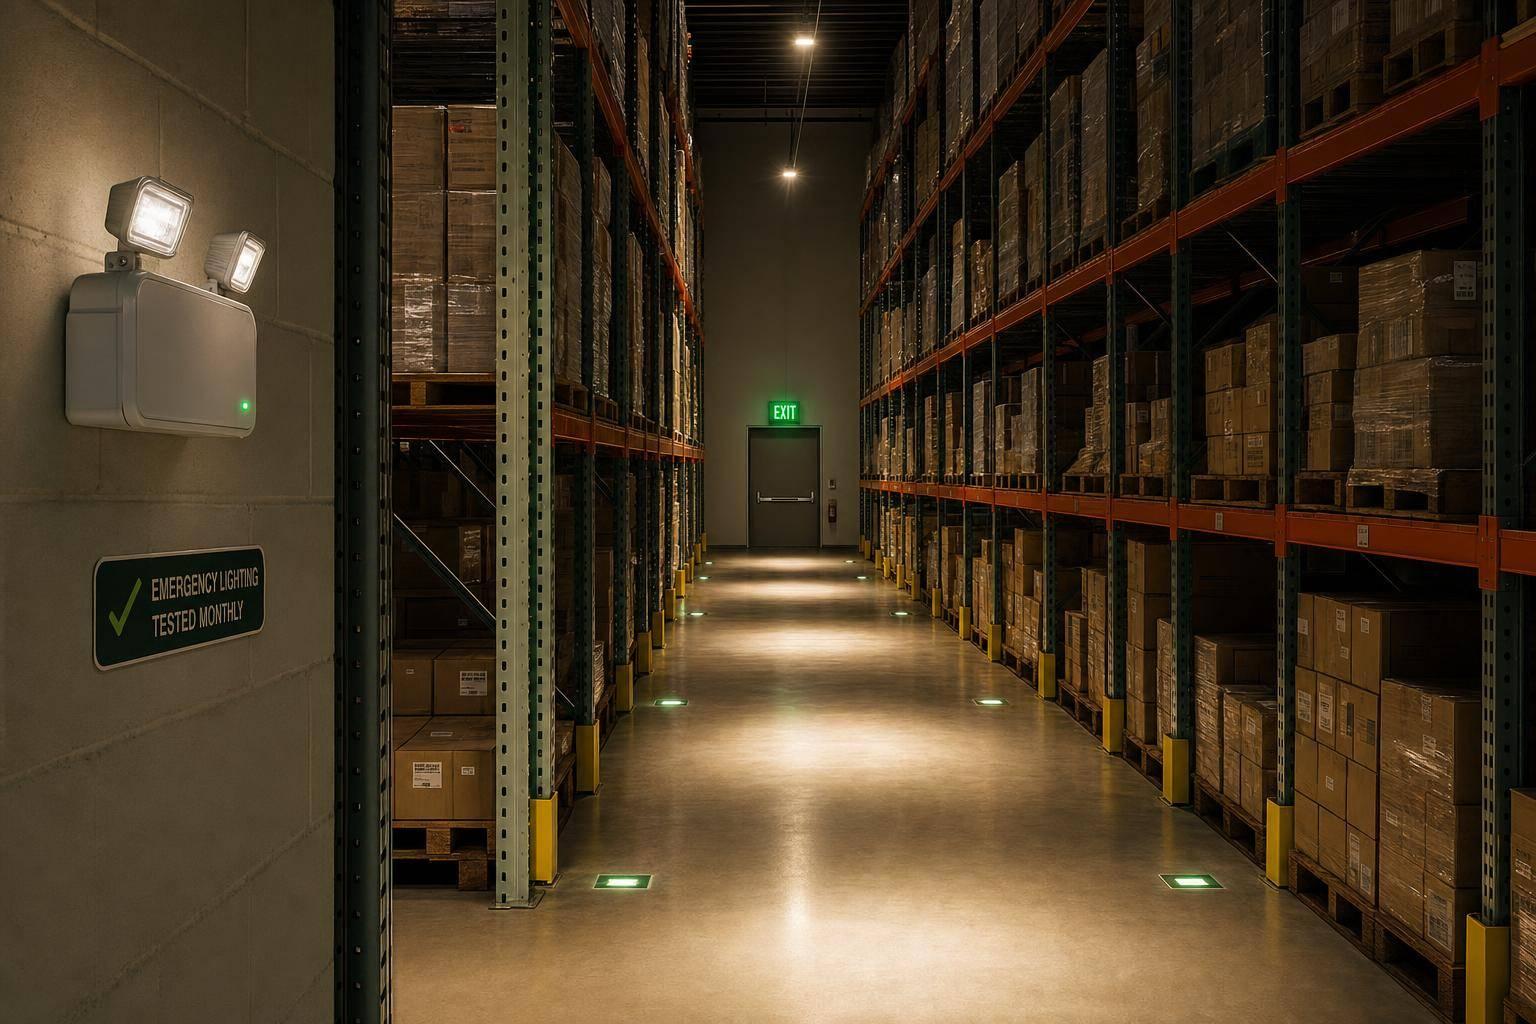
If warehouse emergency lighting does not light the full exit path for 90 minutes and switch on within 10 seconds, it fails its job.
If I were planning this system, I’d focus on one thing first: getting people from the aisle to the public way without dark gaps, wrong turns, or blocked sightlines. In a warehouse, that means I have to plan for rack shadows, loading docks, stairs, doors, exit discharge, backup power, sign visibility, fixture ratings, and test access - not just ceiling coverage.
Here’s the short version:
A few numbers matter right away:
If you want a warehouse emergency lighting design that works, the formula is simple: map the path, light the path, power the path, mark the path, and test the path. The rest of the article explains how I’d do each part without missing code or field issues.
Emergency lighting has to cover the full egress path: exit access, exit, and exit discharge.
The exit access includes aisles, corridors, ramps, and stairs that lead toward an exit. The exit is the protected part between the exit access and the exit discharge. The exit discharge is the outside path from the building exit to the public way.
That last part gets missed all the time. A layout might light the building well, then stop right at the exit door. On paper, that can look fine. In practice, it leaves people stepping into darkness when they still haven’t reached safety.
Inside a warehouse, coverage needs to extend to stairwells, ramps, doors, and any open areas that are part of the exit path.
Covering the path is only part of the job. The system also has to meet the U.S. baseline for activation, light levels, and runtime. If those three pieces fall short, the layout may not do its job during a power outage.
| Parameter | Requirement | Code Reference |
|---|---|---|
| Transfer time after power loss | 10 seconds maximum | NEC Article 700 |
| Minimum illumination at floor level | 1.0 footcandle (fc) average | NFPA 101 / IBC §2702 |
| Minimum at any single point | 0.1 fc | NFPA 101 §7.9 |
| Maximum-to-minimum uniformity ratio | 40:1 | NFPA 101 / IBC |
| Required runtime | 90 minutes | IBC / NFPA 101 |
| Stairway walking surfaces | 10 fc minimum | NFPA 101 |
The system must switch on its own and transfer to emergency power within 10 seconds after normal power fails. It also has to keep 1.0 fc average at floor level for the full 90 minutes, and that average can drop only to 0.6 fc by the end of that period.
Uniformity matters too. The 40:1 maximum-to-minimum ratio is there for a reason. A bright spot next to an almost dark area can be a safety problem by itself, especially when people are moving fast or trying to find stairs and doors.
"Emergency lighting... must maintain 1 footcandle minimum at floor level along the egress path for 90 minutes from normal power failure." - IBC §2702.2.3
In the U.S., these rules come from a few places. IBC §2702 says where emergency power is required based on occupancy, NFPA 101 sets the illumination rules, and NEC Article 700 covers electrical design and wiring. OSHA’s 29 CFR 1910.37 also applies to general industry.
Start this step before you place a single fixture. Map every evacuation route from each work area to the public way. Then go back through that route and flag every spot where movement might slow down, split off, or stop.
Use that map to check the full means of egress across exit access, exit, and exit discharge. Dead-end paths should be marked clearly so they aren't treated as part of the egress route. The map should also show where emergency lighting needs to follow the route itself, not the rack grid.
Once the route is set, mark the places where people are most likely to lose their bearings. In plain terms, that usually means:
These are the first places where direction tends to break down.
Warehouse layouts can hide problems that look fine on paper. Rack shadows and forklift aisles create blind spots along the evacuation path. Shelving rows can also create shadow zones that a standard overhead layout may miss, so the egress map should call out those zones directly to guide fixture placement.
Forklift aisles need their own markings too. When visibility drops, both evacuation risk and collision risk go up.
The map made during design shouldn't disappear into a folder nobody opens again. It becomes the reference for maintenance later on. Record every fixture location on the floor plan so service teams can find them fast. If rack setups or warehouse layouts change, update the map so it reflects any new blind spots in coverage.
Place fixtures anywhere the route shifts or sightlines get weaker. The idea is straightforward: people should be able to follow the path at every decision point without stopping to guess.
Exit signs must be mounted directly above all exit doors. If a door looks like an exit but isn't one, it needs a clear "NO EXIT" sign so people don't head the wrong way during an evacuation.
At turns and intersections, use directional exit signs with chevron indicators to point the way. Those signs must be readable from at least 40 feet away.
After the base code items are in place, look at every spot where the route could become unclear. Intersections, corners, and any area where the path isn't obvious should have directional exit signs with chevron indicators that are readable from at least 40 feet away.
It also helps to add low-mounted egress markers 6–18 inches above the floor. Why so low? If smoke builds up, overhead signs can be harder to see, but lower markers can still show the route.
Warehouses bring their own headache. High-bay racking can create dark zones that won't show up during an empty-aisle lighting check. A space can look fine at first glance, then change once product fills the racks.
Before you lock in fixture placement, use photometric diagrams to model how mounting height and beam angles - usually between 80° and 120° - change ground-level light output, especially in narrow aisles. This gives you a clearer view of what people will see at floor level, not just what looks good from above.
Place fixtures to cut down shadows and dark spots. Pay close attention to dock doors, mezzanine edges, and building entrances, where light levels often drop fast. Then use the photometric plan to check that those areas stay lit with product on the racks, not just when the aisles are empty.
Once you've mapped the egress route, the next step is simple in theory and strict in practice: size the system to meet the required light levels and runtime.
NFPA 101 and the IBC set the baseline for warehouse emergency lighting. Along the egress path at floor level, the initial average illumination must be 1.0 footcandle (fc), and no single point can fall below 0.1 fc. After the full 90-minute runtime, those levels can drop, but only to an average of 0.6 fc and a minimum of 0.06 fc at any point.
There’s also a uniformity rule. The max-to-min ratio cannot exceed 40:1. That matters because a route with bright patches and dark gaps may look fine on paper, but it can still fail code. NFPA 101 also requires 10 fc for new stairs.
Local rules can go further. New York City, for example, requires at least 2 fc at floor level. Chicago also requires emergency lighting to activate during brownouts, defined as a voltage drop of more than 10%. Before you lock in the design, check with the local Authority Having Jurisdiction (AHJ).
Those light levels must cover the full path of travel: exit access, exit, and exit discharge. So even if the aisles are lit well, the system can still miss code if the discharge path drops below the required levels.
This is where many layouts look better than they perform. Empty-aisle readings can overstate performance. The right way to measure is at floor level along the designated egress path, with the racking fully loaded. Why? Because stored product throws shadows that empty aisles don't show.
In plain terms, a warehouse that passes when it's half-empty may not pass during normal operation. The readings you take in that loaded condition should line up with what monthly and annual testing later confirms.
After the layout and light levels are set, you still need proof that the system holds up under test.
Use this testing schedule:
Keep records of testing, inspection, and maintenance for AHJ review. A small field tip helps here too: labeling each fixture with the date of its last successful 90-minute test can make verification much faster during inspections.
Once the egress path is mapped and lit, the backup power source has to keep those lights on during an outage.
For central emergency lighting systems, the switch to backup power must happen within 10 seconds. That changeover is handled by automatic transfer equipment. The transfer setup also needs to react to brownouts and upstream faults.
NEC §700.10(B) says emergency system wiring must be kept in separate raceways and junction boxes from normal building wiring. The reason is simple: a fault in the main electrical system shouldn't knock out the life safety system too.
Transfer equipment and emergency luminaires should also be listed to UL 924, the Standard for Emergency Lighting and Power Equipment.
This fast transfer isn't just a code box to check. In warehouses, it matters a lot.
Many facilities have deep interior areas, and high-bay aisles can turn pitch-black when power drops. A fast switch to backup power helps stop confusion in long rack aisles and keeps the egress path visible when people need to move out fast.
In large warehouses, runtime shapes the whole backup power plan. It affects:
Keep records of transfer-switch inspections and backup-power tests for AHJ review.
With backup power in place, the next focus is clear wayfinding.
Backup power keeps emergency lights on. Exit signs and directional markers tell people where to go. Use the same egress path map to place signs where people need direction, not just where it's easy to mount them.
Exit signs must stay illuminated at all times. Add directional signs anywhere racks, corners, or intersections block the line of sight. Under code, no point in the exit access can be more than 100 feet - or the sign’s listed viewing distance, whichever is less - from a visible exit sign.
The signs also need 6-inch block letters with a 3/4-inch stroke, and they must switch to backup power during an outage. That backup power has to last at least 90 minutes.
In warehouses, that’s where things get tricky. Tall racks and long aisles often block wall-mounted signs, so a sign that works on paper may not work from the floor.
High-bay racking can hide wall-mounted signs at aisle level. Pendant-mounted or end-mounted signs can help keep them below those obstructions and easier to see. In new construction, Running Man pictograms are often used to show the route.
So this isn’t just about having a sign on the wall. Mounting height and clear sightlines matter just as much as the sign itself.
LED exit signs with battery backup fit warehouse conditions and stay visible during outages.
After any rack change, check the view again from the aisle floor. A setup that looked fine before may no longer read clearly once shelving moves.
Document monthly sign checks and annual battery tests. Those records are your best proof of compliance during inspections.
One step people often miss is a visibility audit after any racking or layout change. New shelving layouts can create blind spots that weren’t there before.
Once the egress path is mapped, the next step is picking fixtures that can still put usable light on the floor in a warehouse that’s dusty, hot, cold, or prone to bumps and hits. That matters because dust can reduce emergency-light output by 10% to 30%, depending on conditions. So fixture rating and durability matter just as much as the light level on day one.
The baseline certification for emergency lighting is UL 924. That means the fixture is listed for emergency use and rated for the space where it’s installed.
In combustible-dust areas, fixtures should meet Class II, Division 1 or 2 requirements under the NEC. Class III applies in spaces with ignitable fibers or flyings. T-Class ratings, from T1 through T6, show the fixture’s maximum surface temperature. That helps keep the unit below the ignition point of nearby materials.
Dust, vibration, washdowns, and cold can all lower the odds that emergency lighting will work when people need it most. Matching the fixture rating to the actual warehouse conditions isn’t just a box-checking step. It’s part of safe evacuation.
Once ratings and listings are covered, light distribution becomes the next issue. In high-bay rack layouts, use aisle-focused beam patterns so emergency light lands on the aisle floor instead of getting wasted on top of the racks.
Fixture construction should match the part of the building where it’s going:
High-mounted fixtures cost more to service and make battery swaps slower because lift access is often required. LED fixtures with long service life and integrated emergency batteries can cut how often that access is needed. Self-diagnostic fixtures also reduce manual inspection time.
In high-bay warehouses, loaded racks can block emergency light before it reaches the aisle floor.
Plan for the loaded aisle, not the empty layout on paper. That’s the part people will move through during an emergency.
Put fixtures at rack ends and aisle intersections, where shadows tend to be worst. After installation, use a light meter to check aisle-floor illumination and make sure the light is actually reaching the path of egress.
Warehouse layouts don’t stay still for long. A rack move or storage change can turn a code-ready setup into a shadowed one fast.
Any time racks are moved or storage conditions change, recheck the lighting. What worked before may no longer light the aisle floor the way it should.
After shadow control, the last design step is making emergency lighting simple to test and service. Once fixture placement is locked in, plan for access too. That matters because testing access helps keep the egress path working over time.
NFPA 101 requires a 30-second functional test every 30 days and a full 90-minute discharge test once a year. Keep test records with fixture IDs and access notes.
On paper, that schedule looks simple. In a warehouse, it only works if crews can still reach fixtures after rack changes.
Run the annual 90-minute test under worst-case lighting conditions. Illumination must stay at or above the required end-of-test levels.
That’s the part that tells you whether the system still works when conditions are less than ideal, not just when the space is easy to light.
After any rack reconfiguration, recheck fixture access, test points, and service paths.
In high-bay spaces, access strategy matters just as much as the test plan. A good layout on day one can turn into a headache later if new rack rows block lifts or make fixtures hard to reach.
For high-bay warehouses, use self-testing fixtures or a central inverter system to reduce lift access. Self-testing units run their own 30-second monthly checks automatically and generate reports or failure histories. Central inverter systems keep battery service at ground level. Automated testing also flags battery problems early.
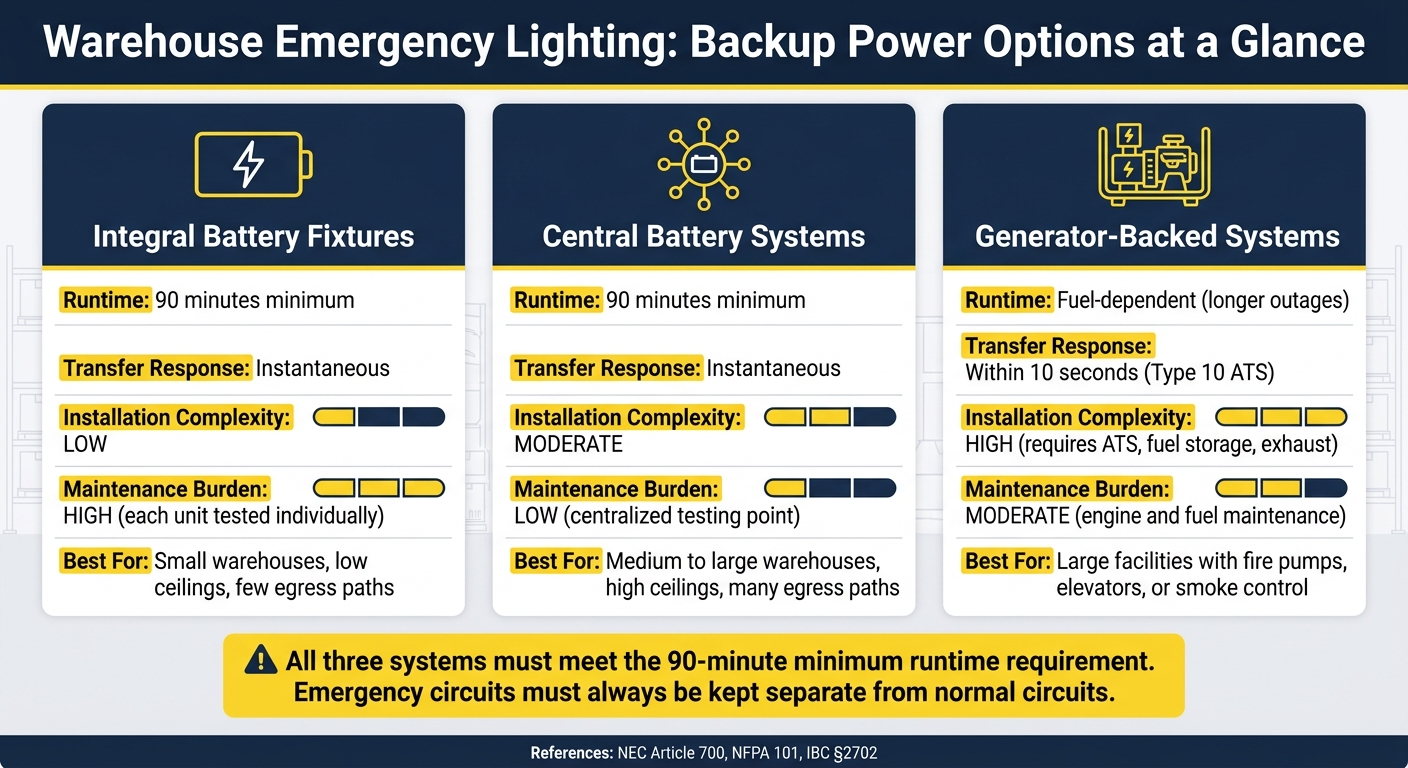
Warehouse Emergency Lighting Backup Power Options Compared
Once you've mapped the egress path, the next call is backup power. In plain English: how do the emergency lights stay on when utility power drops? Warehouse emergency lighting needs a backup source that kicks in on its own during an outage. The right setup depends on the size of the building, ceiling height, and whether you also need to support other emergency loads.
There are three main ways to handle backup power, and each one comes with tradeoffs. No matter which path you choose, all three have to meet the 90-minute minimum runtime requirement. Here's a side-by-side look at what that means in a warehouse setting:
| Feature | Integral Battery Fixtures | Central Battery Systems | Generator-Backed Systems |
|---|---|---|---|
| Runtime | 90 minutes minimum | 90 minutes minimum | Fuel-dependent for longer outages |
| Transfer Response | Instantaneous | Instantaneous | Within 10 seconds (Type 10 ATS) |
| Installation Complexity | Low - uses standard circuits | Moderate - requires dedicated emergency circuits | High - requires ATS, fuel storage, and exhaust |
| Maintenance Burden | High - each unit tested individually | Low - centralized testing point | Moderate - engine and fuel maintenance required |
| Best-Fit Application | Small warehouses; low ceilings; few egress paths | Medium to large warehouses; high ceilings; many egress paths | Large facilities with fire pumps, elevators, or smoke control |
One rule matters here: keep emergency circuits separate from normal circuits.
For small warehouses with low ceilings and only a few egress paths, integral battery fixtures are often the simplest and lowest-cost pick. They’re easier to install and are usually code-compliant when the need is limited to emergency lighting.
That changes when ceilings get higher. In those spaces, testing and service often mean lift access, and that can add labor, time, and hassle. At that point, a central battery system starts to make more sense because service happens from one ground-level location.
Generator-backed systems are a better fit when the building has major emergency loads beyond lighting. Think fire pumps, elevators, or smoke control. If the goal is lighting only, battery-based setups are often the simpler and lower-cost option.
Once the backup source is chosen, the next step is placing exit signs and directional markers so the route is easy to follow.
When warehouse layouts, code rules, and retrofit limits go past rule-of-thumb planning, bring in a specialist early. It can save you from rework, delays, and failed inspections.
Once fixture locations and backup power are mapped out, many warehouses still need a specialist to check the design against the actual rack layout and local code. On paper, a plan can look fine. On the floor, it can fall apart fast.
This usually comes up when the layout gets complicated enough that field judgment alone isn't enough.
Warehouses with ceilings 20 feet or higher need specialist review because floor-level emergency light output drops fast in high-bay spaces, and basic emergency heads often cover only a small part of the floor area.
Irregular racks, columns, and stored product can cast shadows over egress paths. That means you may need a photometric review before fixture placement, not after.
Retrofit projects bring their own headaches too. Driver limits, wiring issues, and ballast-bypass wiring all have to be worked through, while emergency units still need to hit the 90-minute runtime requirement.
Hazardous areas add another layer. In those spaces, you need the right NEC Class and T-Class coordination.
At that stage, the job is no longer just about picking fixtures. It becomes a full design check.
A qualified lighting designer can validate photometric layouts against loaded rack setups, confirm floor-level visibility across the full egress path, and prepare documentation that supports AHJ sign-off. They can also help with fixture and control specs, backup power sizing, LED replacement sizing, and records for monthly 30-second functional tests and annual 90-minute discharge tests. Keeping all of that documentation in one place also makes fire marshal inspections easier to handle.
Once the layout, power, and fixture locations are locked in, there’s one last thing to check: does the egress path still read clearly at floor level? In warehouses, emergency lighting often breaks down in the same trouble spots - rack shadows, dock edges, and route changes. The system only does its job when coverage, backup power, signs, and testing all work together.
The basics come down to six things done the same way, every time.
It also makes sense to recheck the layout after any rack change or floor-plan update. New shadows can block the egress path without much warning. For complex retrofits or high-bay layouts, Luminate Lighting Group can validate the design, size backup power, and prepare inspection documentation.
Changing warehouse rack layouts means you need a new risk review to keep emergency lighting in line with code. Under IBC and NFPA rules, egress paths must have at least 1 foot-candle of light for 90 minutes.
Here’s the issue: when racks move, light patterns change too. New shadows can fall across aisles, and taller or shifted storage can block fixtures that used to light an exit route just fine. That’s why an updated audit matters. It checks that exit paths are still lit the way they need to be and that the space stays code-compliant.
The best backup power option comes down to your warehouse’s day-to-day needs and the rules you have to meet. In most cases, you’ll choose between self-contained systems with individual battery units and central battery systems that use one shared power supply.
For many low-occupancy spaces, a battery-only setup may be enough. But the baseline rule stays the same no matter which route you take: the system must turn on within 10 seconds of a power outage and deliver at least 1 foot-candle along egress paths for 90 minutes.
Bring in a lighting design specialist early, during the initial assessment of your project. That gives you a much better shot at building an emergency lighting system that fits your facility’s day-to-day use, safety needs, and code requirements - without getting hit with costly changes later.
A specialist also matters any time you make structural or layout changes. Those updates call for a new risk assessment so you can stay compliant and keep the lighting plan accurate.


