.svg)
Zone-by-zone guide to seven lighting controls that secure retail energy-code compliance and cut lighting use by up to 68%.

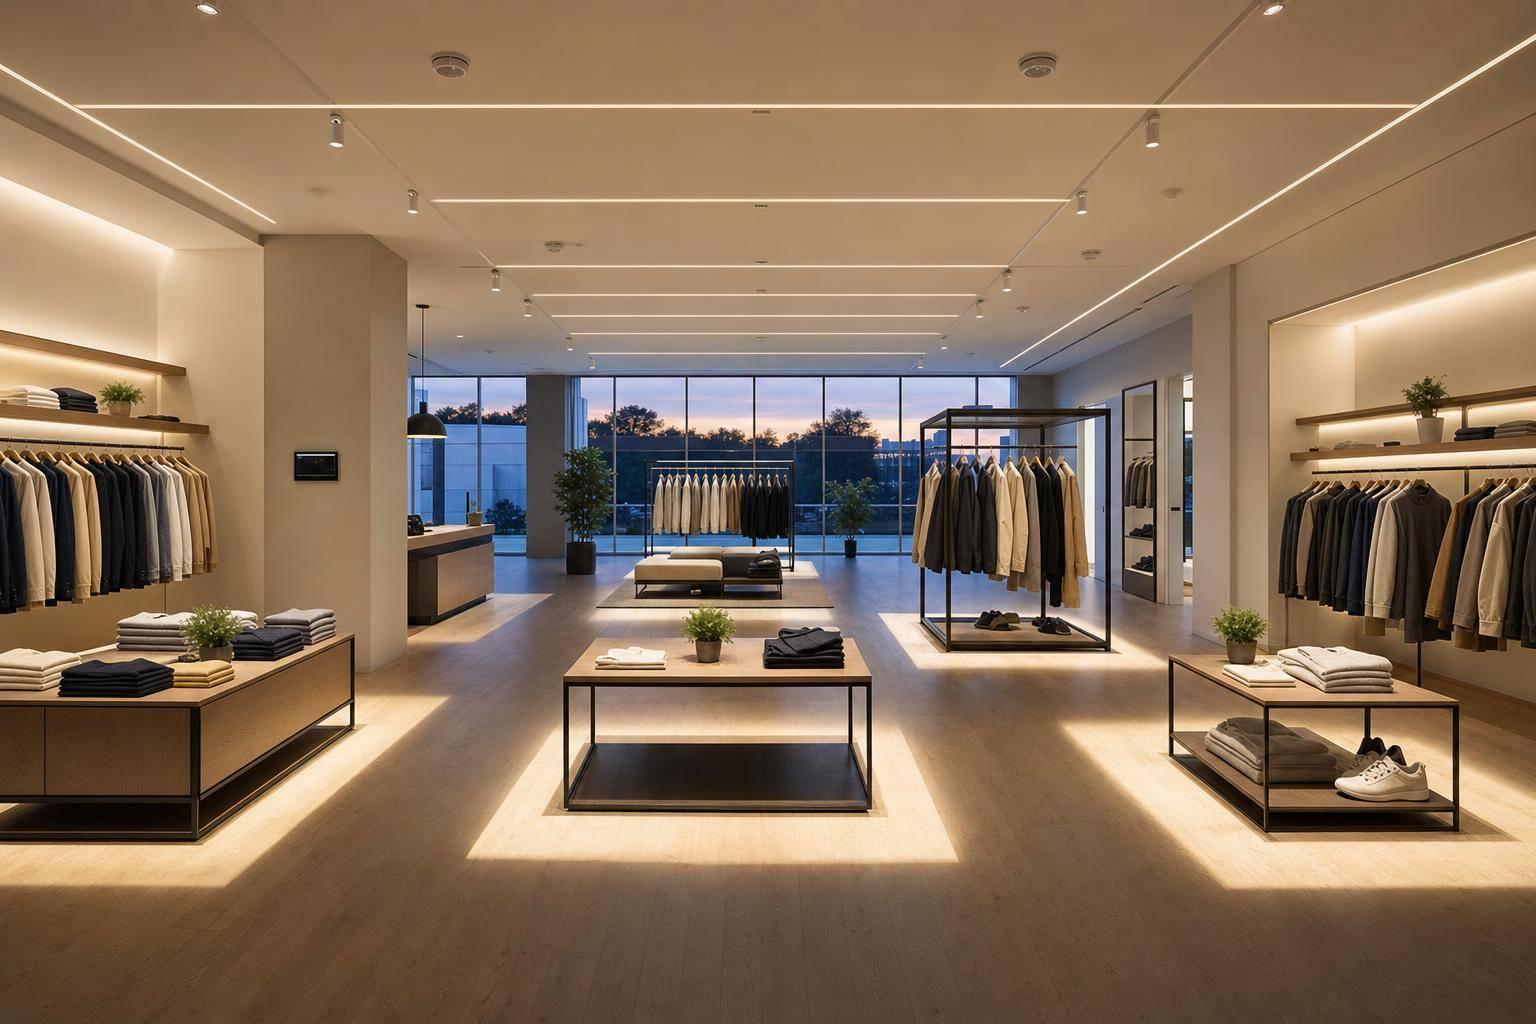
Retail lighting code is now about control, not just LEDs. If you want a store retrofit to pass, I’d focus on seven control types: occupancy/vacancy sensors, time-switch controls, astronomical timeclocks, daylight-responsive controls, multi-level or continuous dimming, networked wireless systems, and demand-responsive controls.
Here’s the short version: many codes now expect lights to cut power by at least 50% within 20 minutes after a space is empty, while some projects also need continuous dimming, daylight response, and functional testing before closeout. Done right, these controls can lower lighting energy use by 40% to 68% in the right zones.
If I were sizing up a retail project, I’d look at four things first:
Here’s how the seven options usually fit:
| Control | Best use | Main code/job focus | Setup notes |
|---|---|---|---|
| Occupancy/Vacancy Sensors | Fitting rooms, restrooms, stockrooms | Auto shutoff or dim-down after vacancy | Sensor aiming and time-delay setup matter |
| Time-Switch Controls | Sales floor, back rooms | Scheduled shutoff by store hours | Check control wiring and testing |
| Astronomical Timeclocks | Exterior lighting and signage | Sunrise/sunset scheduling | Best for dusk-to-dawn control |
| Daylight-Responsive Controls | Perimeter and skylit zones | Auto dimming with daylight | Needs photosensor setup and tuning |
| Multi-Level/Continuous Dimming | Sales floor, displays, corridors | More than simple on/off control | Match dimming control to LED driver |
| Networked Wireless Systems | Large multi-zone stores | Central control across fixtures/zones | Less new control wiring, more software setup |
| Demand-Responsive Controls | Large open zones or whole store | Utility event load reduction | Needs signal integration and testing |
Bottom line: I’d treat retail lighting compliance as a zone-by-zone control plan, not a fixture-only upgrade. The article below breaks down where each control fits, what codes tend to expect, and what to check before sign-off.
No single control works for every retail space. A dimmer that feels right on a boutique sales floor can be a bad match for a high-bay stockroom. So before you compare the seven control types, it helps to look at the four things that separate a good fit from a poor one.
Start with code-required functions. Check the basics first: automatic shutoff, multi-level reduction, and required commissioning.
The space type shapes the right choice. Sales floors, fitting rooms, stockrooms, and exterior entry zones all have different traffic patterns and visibility needs. Fitting rooms, for example, need light that feels comfortable and easy to control. Those day-to-day use patterns help determine which of the seven controls makes sense.
Controls must avoid disrupting store operations. A control system should support normal retail activity, not get in the way. If staff or customers have to fight with the lights, that’s a problem.
Retrofits must install cleanly in existing buildings. The control system needs to match the retrofit plan. In many existing stores, that means low-disruption installation, simple wiring, and easy programming.
The seven control types below meet these needs in different ways.
Occupancy and vacancy sensors handle automatic shutoff in low-traffic retail areas. Under IECC 2024 and ASHRAE 90.1-2022, lighting has to automatically cut power by at least 50% within 20 minutes after everyone leaves a space. That’s why these sensors are often the first retrofit move in areas that sit empty for long stretches.
The difference between the two modes matters, especially for code. Occupancy sensors use auto-on/auto-off logic: the lights switch on when someone walks in and switch off after they leave. Vacancy sensors work a little differently. Someone has to turn the lights on manually, but the system still shuts them off on its own. Some local codes call for manual-on in certain zones, while others allow auto-on, so check the required mode before you buy hardware.
These sensors make the most sense in stockrooms, restrooms, break rooms, back-of-house corridors, and offices. Refrigerated cases are another strong use case. Motion-activated LED lighting in retail refrigeration can cut energy use by up to 60%. In practice, that means sensor selection should follow the needs of each zone, not a one-size-fits-all store rule.
Sensor type also depends on the room layout. Passive Infrared (PIR) sensors pick up heat movement and need a clear line of sight, which makes them a good fit for small enclosed rooms. Microwave sensors can detect motion through thin partitions and around shelving, so they tend to work better in high-ceiling stockroom aisles with racking.
In some spaces, full shutoff isn’t the best move. Sensors can dim lights to about 30% when the area is empty instead. That keeps a low light level for security or restocking. Before the ceiling gets closed up, run the sensors in test mode with short time delays. It’s a simple way to spot wiring or zoning problems early. This proactive approach is a key part of our proven process for ensuring long-term system reliability.
One more thing: 0-10V dimming needs a separate low-voltage control pair and consistent polarity. Don’t tie together sensor and dimmer outputs unless the manufacturer says it’s allowed. Start with these controls in support spaces where occupancy is less predictable.
Automatic time-switch controls turn lights on and off on a preset schedule. For stores with fixed opening and closing hours, they handle the code-required shutoff with very little hands-on work. IECC 2024 and ASHRAE 90.1-2022 both require automatic shutoff controls. That makes these controls a good fit when hours are predictable and occupancy sensors would add little.
They work best in spaces that follow the same pattern day after day. Think exterior parking lots, storefront signage, corridors, storerooms, and other back-of-house areas. In setups with scheduled dimming, there’s another upside: the dimming step can reduce heat and electrical strain on LED drivers. One modeled case used 4 hours at full power, 12 hours at 30%, and 8 hours off. Compared with an always-on setup, energy costs fell by an estimated 68%.
Where do these projects usually get messy? Retrofit wiring. 0-10V dimming is not the same as a 120V phase-cut dimmer. It needs a separate low-voltage control pair. Class 1 and Class 2 circuits also have to stay separate under the National Electrical Code (NEC), or you may run into problems during inspection. And there’s a common mistake worth calling out: don’t connect a manual dimmer and a time-switch controller to the same 0-10V pair unless the controls are built to work together. If they fight each other, flicker or failed dimming is often the result.
Commissioning is the last point where things can still slip. IECC 2024 requires functional testing to confirm that scheduled dimming and shutoff work as intended. Test the system before closeout so the lights dim or shut off on schedule without staff stepping in. That’s a big reason time-switch controls are one of the easier retail retrofit controls to check at closeout.
An astronomical timeclock is a timer that follows local sunrise and sunset instead of a fixed daily schedule. That difference matters for exterior retail lighting, where daylight hours shift over the course of the year. Because of that, astronomical timeclocks are a strong retrofit option for exterior zones that need steady dusk-to-dawn control.
They work best in parking lots, on facades, and for signage - outside areas that need to track sunrise and sunset, where automatic dusk-to-dawn control matters most. When paired with LED fixtures, this type of exterior automation can cut energy use by 40% to 60% compared to uncontrolled operation.
Before handoff, run a full-cycle test to make sure the lights switch at the right time. For interior sales areas, daylight-responsive controls are better suited to manage changing light levels directly.
For interior areas where daylight changes the lighting load, use daylight-responsive controls. In skylit, windowed, and perimeter retail zones, these controls help meet code. IECC 2024 and ASHRAE 90.1-2022 require fixtures in windowed and skylit zones to dim automatically as daylight levels change.
These systems usually rely on 0-10V continuous dimming. A photosensor trims fixture output smoothly - often from 10% to 100% - based on the light it detects. One feature worth checking for is daylight hold-off. That setting keeps lights off when daylight already meets the target level, even if the space is occupied. In plain terms, if the sun is doing the job, the electric lights stay out of the way. That makes this setup a good match for window lines, skylights, and perimeter aisles.
In a retrofit, daylight controls often mean adding 0-10V dimming drivers and a dedicated low-voltage control pair, usually purple and gray/pink conductors.
The part people miss most often is commissioning. Installing the gear is one thing. Getting it to work the way the space needs is another. Photosensor placement, the dimming curve, and daylight hold-off setpoints all need on-site tuning, and it's best to do that with the sensor's test mode before ceilings are closed or lift equipment is removed. IECC 2024 also requires functional testing to confirm that windowed and skylit zones actually dim when daylight is enough.
For closeout, keep these items together for inspectors and facility staff:
Daylight-responsive controls take care of zones near windows. Multi-level dimming covers the rest of the store.
That matters because simple on/off switching usually isn't enough for retail retrofits. Sales floors, fitting rooms, corridors, and stock areas all have different lighting needs, and they don't need the same output all day.
High/low dimming is the most common path for meeting code. Fixtures run at full output during busy periods, then drop to a lower setting when traffic slows down. That setup supports compliance and keeps selling areas usable at the same time. It can also reduce energy use while maintaining a safe minimum light level.
With 0-10V control, stores can go a step further with continuous dimming. Instead of jumping between just two levels, staff can fine-tune light output for displays, shopper comfort, and balance with available daylight. Think of it as the main control layer for the store: it works alongside daylight harvesting, not in place of it.
These controls work best when they're matched to each zone's traffic patterns and lighting demand. A fitting room doesn't need the same setup as a stock room, and a sales floor near the entrance may need a different dimming range than an interior aisle.
A few installation details matter here:
Section 5 covered dimming inside a single zone. Networked wireless controls take that same idea and extend it across the whole store.
They tie together scheduling, occupancy response, daylight dimming, and local overrides across multiple retail zones without new control wiring.
The big win here is reliable automatic power reduction across many zones, with an easier retrofit install. That makes wireless systems a strong fit for stores with mixed hours, uneven foot traffic, and floor plans that change often.
Wireless zoning can also cut labor because it skips new home-run wiring and makes zone updates faster. In plain English: if you need to separate stockrooms, fitting rooms, and entry areas into their own groups, wireless grouping makes that job much easier.
Before closeout, functional testing should verify:
It also helps to confirm that fixtures appear on the DesignLights Consortium (DLC) Qualified Products List. That can support inspection and rebate eligibility.
The next step is matching each control type to the retail zones where it works best.
Schedules and daylighting cover day-to-day use. Demand-responsive controls do something different: they cut lighting load when the grid asks for it.
These controls react to utility or grid signals by dimming lights during peak periods. Many current codes and utility programs now require or reward automatic load reduction at those times. In many systems, that reduction happens through 0-10V continuous dimming, often to hit a required cut of 50% or more during set periods.
Demand-responsive controls tend to work best in high-ceiling aisles, stockrooms, corridors, and other large open areas where lighting load is high and short-term dimming won’t get in the way of store operations. In those spaces, a utility event can trigger an automatic lighting reduction without bothering customers or staff.
For retrofits, the big issue is how the system receives and carries out the utility event signal. The control interface needs to accept an external demand-response signal and turn it into a dimming command for the correct zones. That sounds simple on paper, but this is where jobs can go sideways.
A common mistake is putting a manual dimmer and an automated control on the same 0-10V pair when the manufacturer does not allow it. That can lead to flicker or dimming that just doesn’t work. It also helps to keep Class 1 and Class 2 circuits separated in conduits as required by the NEC, which can save trouble during inspection.
Commissioning matters here too. Trained commissioning is needed to dial in event response, dimming level, and zone behavior.
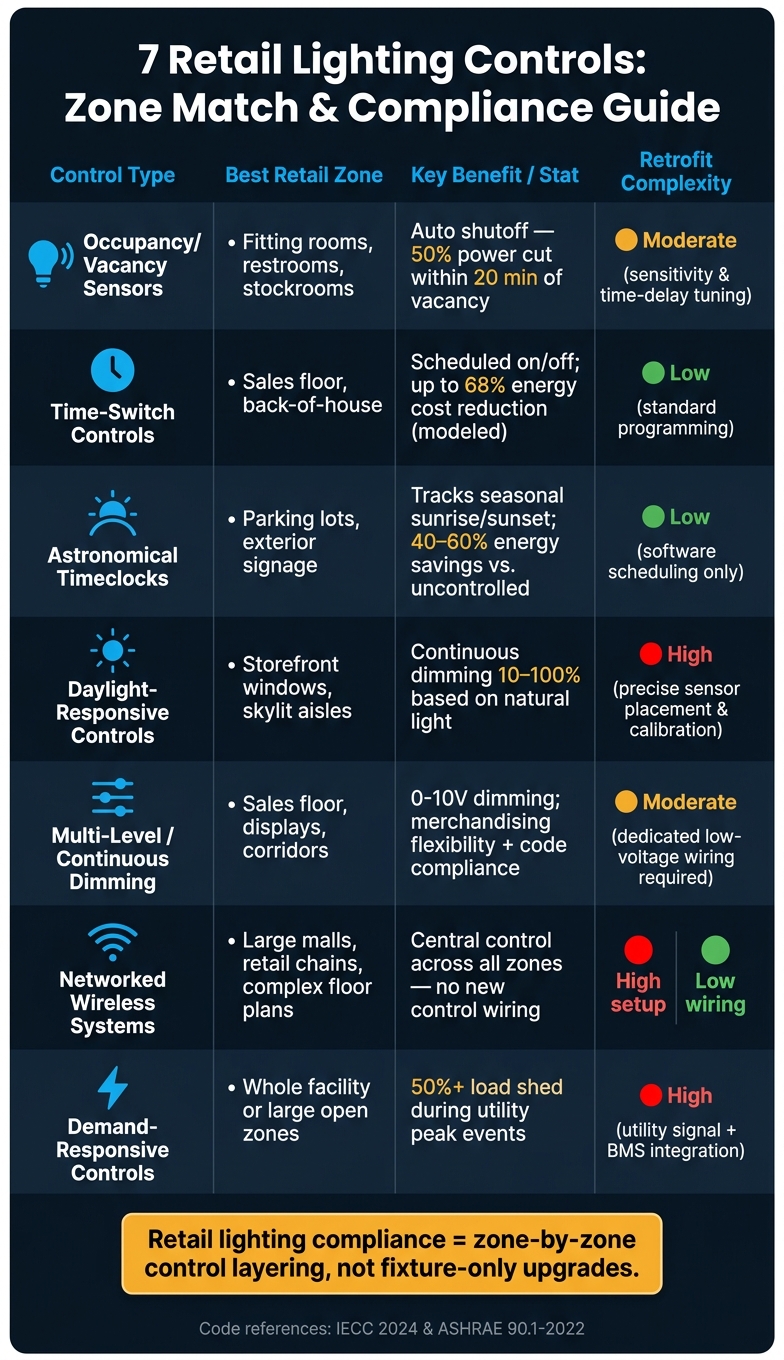
7 Retail Lighting Controls: Zone Match & Compliance Guide
These controls start to make sense once you match them to the part of the store where they do the most good. That’s the main idea here: put the right control in the right zone.
Occupancy and vacancy sensors work best in spaces where people come and go at random, like fitting rooms, restrooms, stockrooms, and private offices. In those areas, leaving lights on all day just wastes power.
Automatic time-switch controls are a smart fit for general lighting on the sales floor and in back-of-house spaces that follow store hours. Astronomical timeclocks handle a different job. They belong outdoors, where lighting needs to follow actual sunrise and sunset instead of a set time on the clock.
For daylight zones near front windows or under skylights, daylight-responsive controls are the practical choice. They adjust lighting based on how much natural light is already in the space. On the sales floor, continuous dimming controls help merchandising teams fine-tune the look of displays without running lights at full output all the time.
Networked wireless systems make more sense in large retail sites with many zones. If a store has hundreds or even thousands of fixtures, managing each one by hand just doesn’t scale. Demand-responsive controls sit at the store-wide level and are used by retailers that take part in utility demand-response programs.
Use the table below for a quick zone-to-control match.
| Control Type | Where It Fits | Primary Reason |
|---|---|---|
| Occupancy/Vacancy Sensors | Fitting rooms, restrooms, stockrooms | Reduces lighting power by at least 50% within 20 minutes of vacancy |
| Time-Switch Controls | Sales floor, back-of-house | Automates open/closed hour transitions |
| Astronomical Timeclocks | Parking lots, exterior signage | Tracks seasonal sunrise and sunset times |
| Daylight-Responsive Controls | Storefront windows, skylight zones | Dims fixtures based on available natural light |
| Continuous Dimming | Sales floor, merchandising displays, corridors | Supports merchandising flexibility and a low-power dimming step |
| Networked Systems | Malls, chain stores, large complexes | Centralized control and automated testing |
| Demand-Responsive Controls | Store-wide for utility-program participants | Peak load reduction during grid events |
The previous section covered placement. This table compares code fit, retrofit effort, and scale so you can scan the options fast.
| Control Type | Energy Code Alignment | Retail Zone Suitability | Required Control Functions | Retrofit & Commissioning Complexity |
|---|---|---|---|---|
| Occupancy/Vacancy Sensors | Baseline - IECC/ASHRAE | Stockrooms, restrooms, fitting rooms | Automatic shutoff or 50% reduction within 20 minutes | Moderate: Sensitivity and time-delay tuning required; PIR needs line of sight |
| Automatic Time-Switch Controls | Baseline - IECC/ASHRAE | Sales floor, back-of-house | Scheduled on/off by store hours | Low: Standard programming; minimal wiring changes |
| Astronomical Timeclocks | Baseline - exterior lighting | Parking lots, exterior signage | Sunset/sunrise tracking | Low: Software-based scheduling only |
| Daylight-Responsive Controls | Baseline - mandatory where windows or skylights exist | Storefront perimeter, skylit aisles | Continuous dimming based on daylight levels | High: Precise sensor placement and calibration required |
| Multi-Level and Continuous Dimming Controls | Baseline - Title 24 and IECC | Sales floor, accent and display lighting | 0-10V dimming from 10% to 100% output | Moderate: Requires dedicated low-voltage control wiring (purple/gray leads) |
| Networked Wireless Lighting Control Systems | Advanced - multi-site and large-project use | Large malls, retail chains, complex floor plans | Individual fixture addressing, remote monitoring | High setup, low wiring: complex software configuration; no new control runs |
| Demand-Responsive Lighting Controls | Advanced - large retail and grid-interactive projects | Whole facility or selected zones | Load shedding during peak grid demand | High: Requires utility signal integration and building management system (BMS) tie-in |
For most single-store retrofits, baseline controls handle the job. Wireless and demand-response controls make more sense for larger, multi-site rollouts where teams need tighter oversight across many locations.
Networked wireless systems tend to pay off when a retailer wants remote monitoring, scheduling, and testing across many zones. Daylight-responsive controls bring the most commissioning risk, since performance depends heavily on sensor placement and calibration. A small setup mistake there can throw off the whole zone.
These controls work best when you use them together. No single device can handle retail energy code compliance on its own. Retail spaces meet code by layering controls across each zone, not by relying on one piece of hardware.
Before closeout, check a few things early:
That upfront planning can make the difference between a retrofit that passes inspection smoothly and one that runs into delays. It also has a direct effect on payback.
Luminate Lighting Group can help with control selection, zoning, energy audits, rebates, and 179D support for compliant retail LED retrofits.
Retail energy codes usually ask for more than simple on-off lighting control. A lot of them require occupancy sensors that dim the lights or shut them off within 20 minutes after a space becomes vacant. They also call for daylight-responsive controls in daylight zones that meet the code criteria.
Many codes also push for continuous dimming instead of older bi-level switching. The reason is pretty simple: it can cut energy use while still keeping lighting performance where it needs to be.
Match each control to the job that zone needs to do, while still meeting energy code rules. On sales floors, continuous dimming and daylight harvesting help keep the space looking inviting while cutting energy use near windows and skylights.
Stockrooms and restrooms are a good fit for occupancy sensors. In larger spaces, digital addressable lighting systems give you tighter control over individual fixtures or groups, and they can make emergency lighting tests and maintenance tracking easier to manage.
Before a lighting retrofit inspection, check that the installed controls work as intended and that the lighting power density lines up with your approved calculations.
You’ll also want to confirm that dimming circuits are labeled and installed the right way as Class 1 or Class 2, with proper separation between them. That detail matters. If those circuits are mixed up, inspection can get messy fast.
It’s also smart to test how manual dimmers and occupancy sensors interact. On paper, both can look fine. In practice, they can fight each other if the setup isn’t coordinated.
Have your paperwork ready before the inspector arrives, including:
A little prep here can save time, avoid back-and-forth, and make the inspection go a lot smoother.


